Your Basic P180 Rig - Sans Fan Grills - Filter Door Mod
Posted: Tue Jul 17, 2007 5:21 pm
Late last year, I posted this topic about my new P180 rig. Since last December, my computer has evolved a little bit and I did some things I have not seen repeated here, enough for a new topic in my opinion.
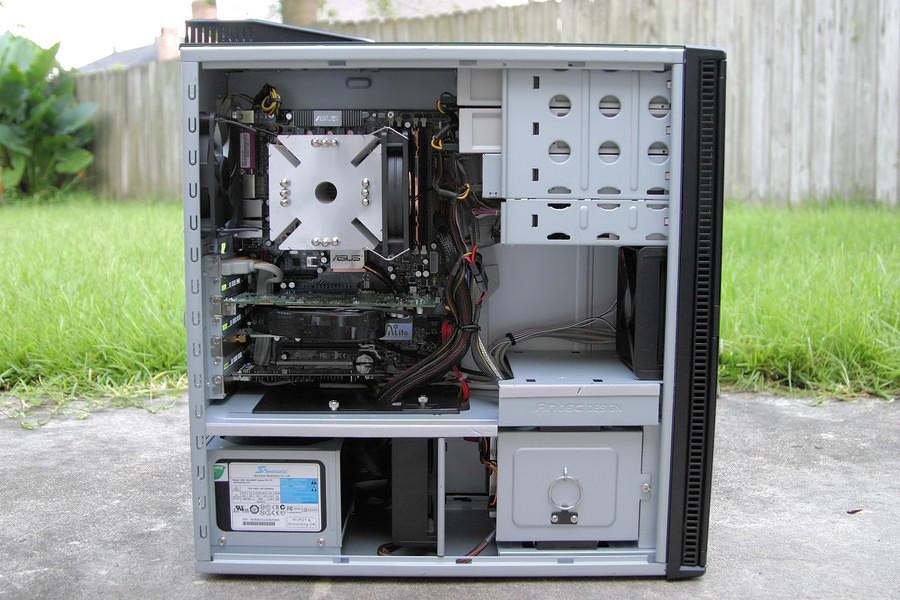
This is a pretty basic rig based on the Antec P180. Most of my purchasing decisions were made with the help of the fine people here. With the fans undervolted, the case is nearly silent, although a keen ear can detect the hard drives spinning. I recently worked up the courage to cut out the fan grills with a Dremel. I also modified the plastic doors covering the filters, allowing more airflow.
Parts List (complete):
Antec P180 Case
Seasonic S12-500 PSU
Asus A8N32-SLI Motherboard
AMD 4400 2.2ghz Athlon 64 Processor
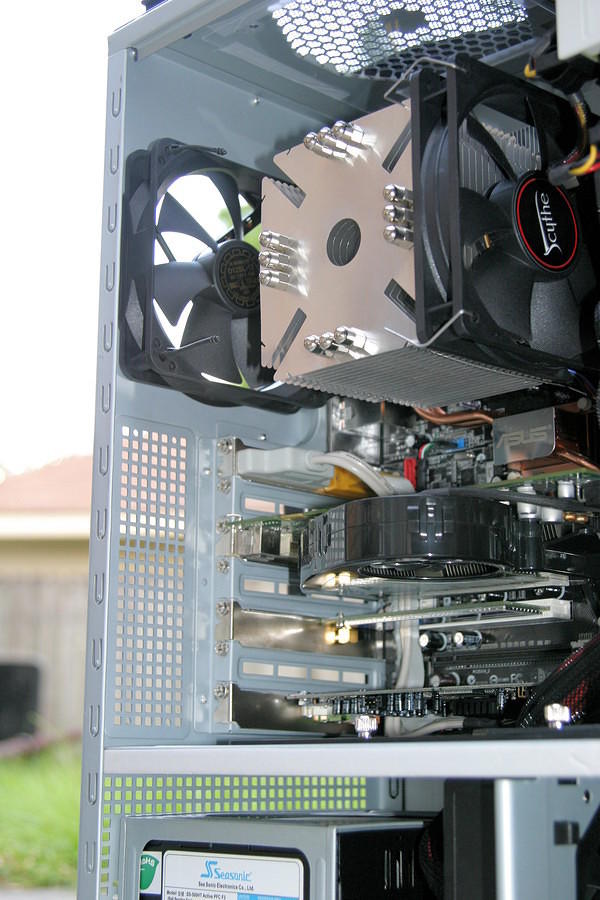
with Scythe Ninja heatsink (semi-passive - CPU fan will usually be off)
eVGA (nVidia) 7800GT (256-P2-N519-AX)
with Arctic Cooling Accelero X1 VGA Cooler
Two (2) KINGSTON 1GB PC3200 RAM Modules KVR400X72C3A/1G
with Vantec heat spreaders
[edit 10/29/07]
Three Samsung HD501LJ 500GB Hard Drives
1 for OS, 2 for RAID 1 media storage
One empty IDE HD enclosure for occasional access of old drives.
[/edit]
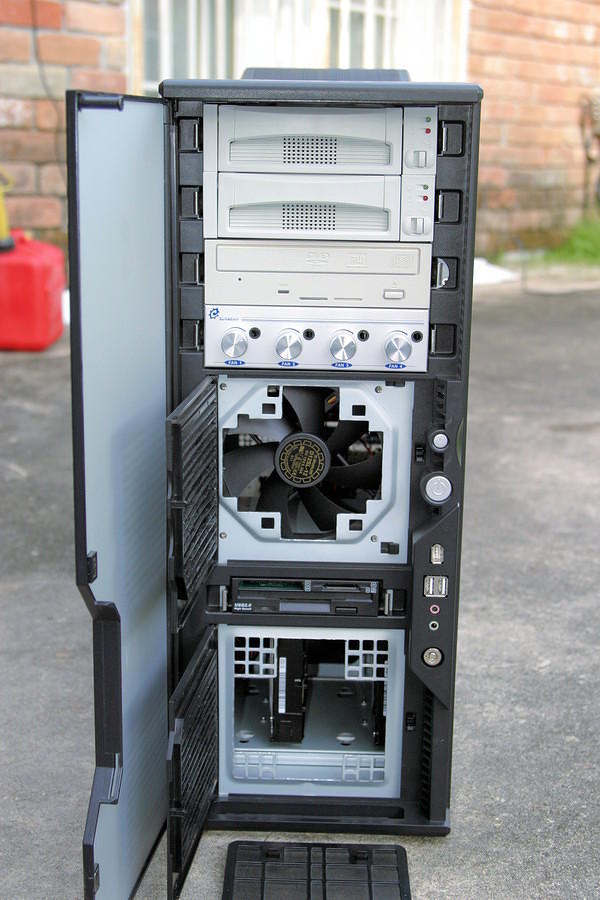
Pioneer DVD-RW DL Optical Drive (DVR-108)
Three (3) YATE LOON 120mm Case Fans (D12SL-12)
undervolted to 5-7v by Sunbeam Rheobus fan controller
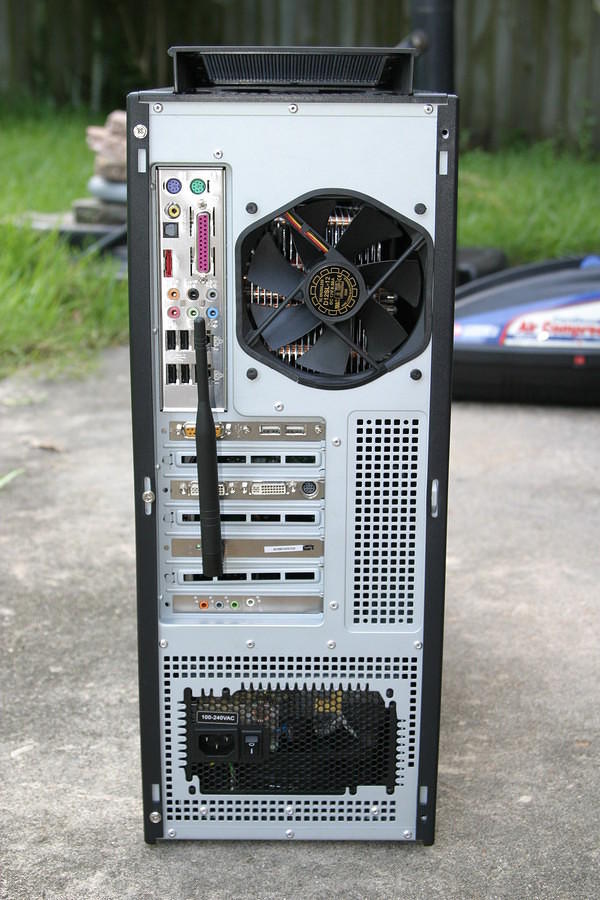
Creative X-Fi XtremeGamer Sound Card
Linksys WMP54GS PCI Wireless Card
Floppy Drive/Card Reader Combo
The Pictures:
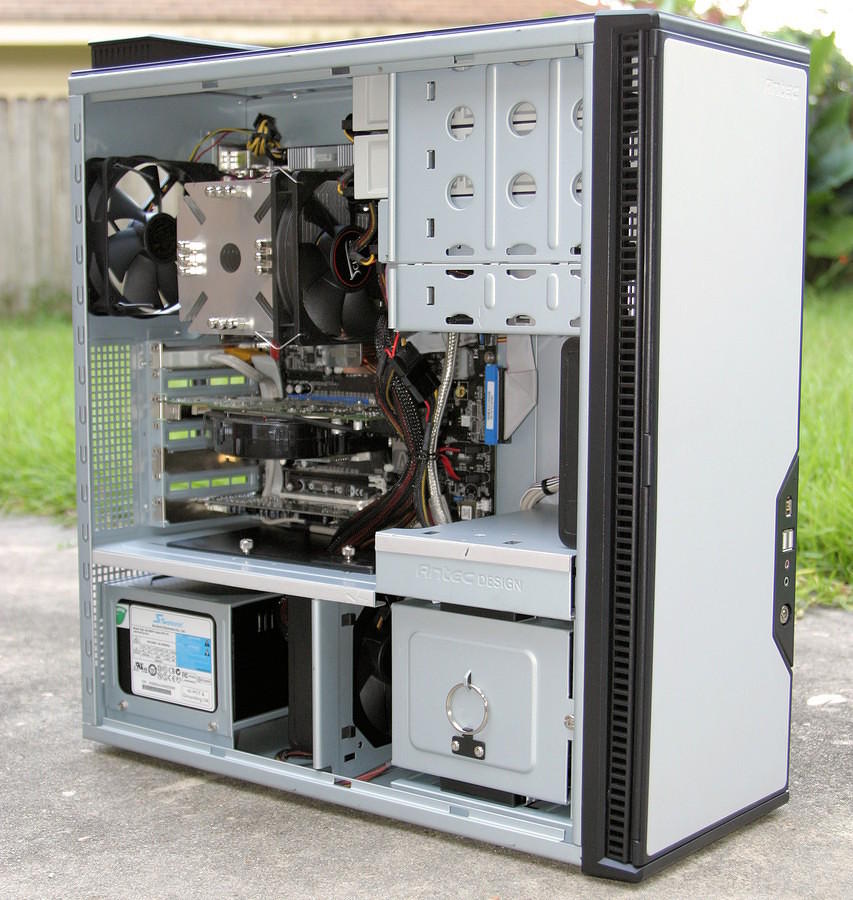
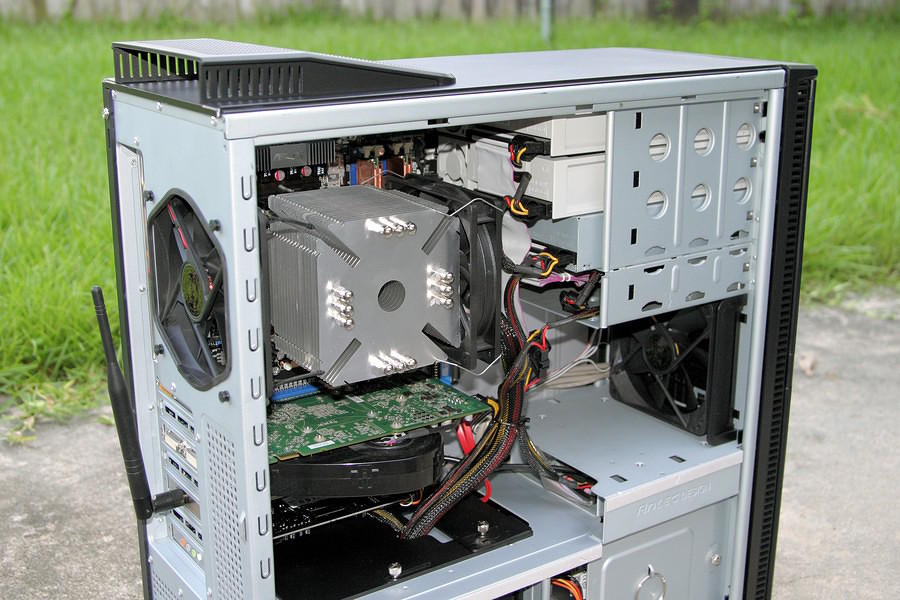
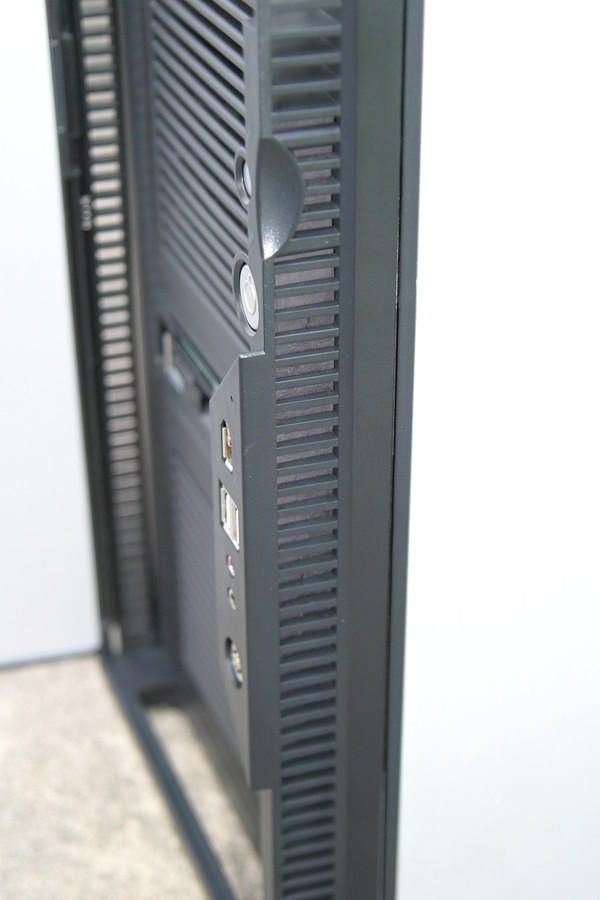
I’ve tried to minimize any obstruction of airflow. Some cables such as the AC 12v CPU power plug are routed under the motherboard.
I also removed the top drive cage and tracks for the same purpose.
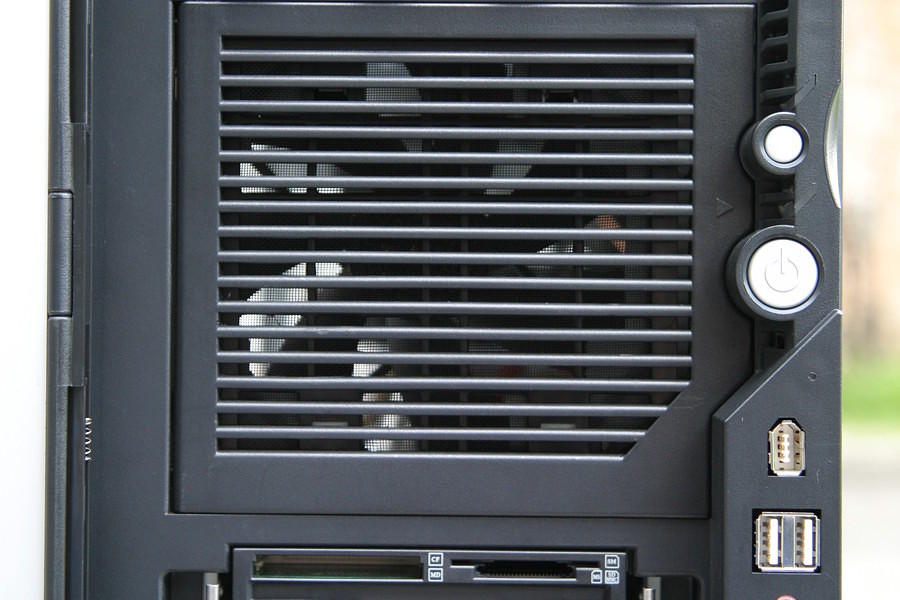
At the suggestion of some folks here I sealed the top fan grill with some clear, rigid plastic.
Although I find it hard to believe this would actually improve temps, keeping dust out is reason enough to close it off.
Recently I worked up the courage to remove the fan grills with my new Dremel XPR 400. I had the luxury of practicing on another P180 before grinding away at my own case. I also used a ‘blade sharpening’ attachment to smooth out the cuts a bit.
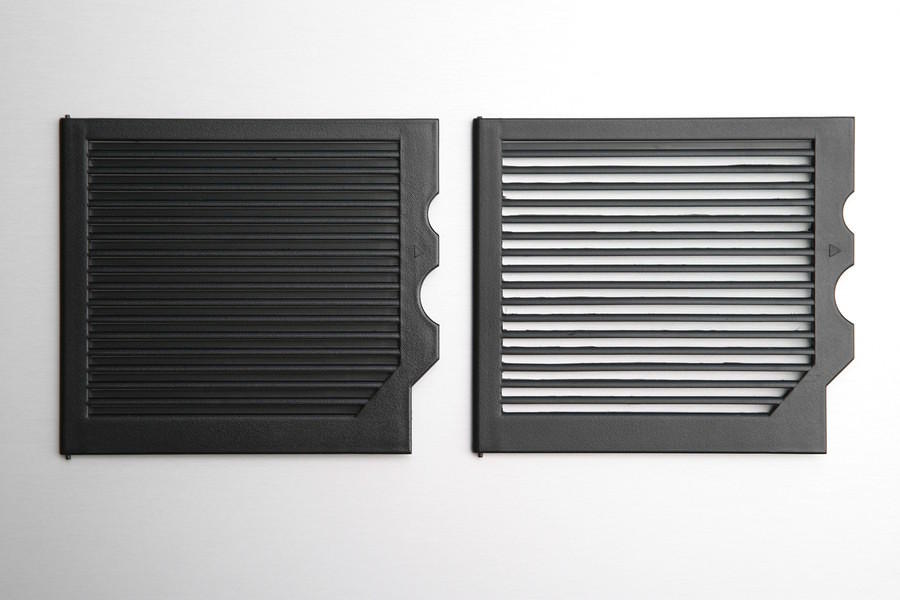
Perhaps the only modification making this topic worthwhile is the work I did on the fan filter doors. I took a Dremel and XACTO knife and removed some of the plastic, keeping the horizontal fins intact but removing the plastic behind it that impedes most of the airflow. This lets plenty of air in with no detriment to the cosmetic appearance. It took some practice before I figured out the cleanest method.
I used a Dremel at low speed ("3" on mine) and a standard cut off wheel. I made the cuts with the door front face down. With a ruler and XACTO knife, I made a line marking my best guess as to where the top edge of each fin would be (1/16th of a inch from the bottom of the fin). With that as a guide, I started my cut my easing the running dremel onto the edge of the line I made. Once comfortable with the cut-off wheel placement, I pushed gently on the door, leaving, holding the dremel stationary (much like a table saw. Since the wheel is round (duh) I did not make the horizontal cuts all the way to the end. It's worth noteing that you need only let the wheel sink about 2mm into the plastic. To finish each one, I first 'shaved' off the excess plastic that accumulates on the sides of the cuts, then finished the job by cutting to the ends, and then making small vertical slices along either side. I also did some touchup as needed with the XACTO knife. Repeat a dozen times.
I found this work to be very time-consuming but worthwhile. I did the top and bottom doors several months apart. During the second time around, I found it easier to mark all the lines, then do all the dremel cuts and then do the final touchup work. That way, you can get "in the groove" (sorry I can't think of a better phrase), make good cuts consistantly and be done with the noise making. With only the XACTO work ahead of you, you can half pay attention to the TV or whatever and the work won't seem quite so tedius.
I also inserted some black construction paper here to stop light leaks from the power/disk LEDs... just another anal fix.
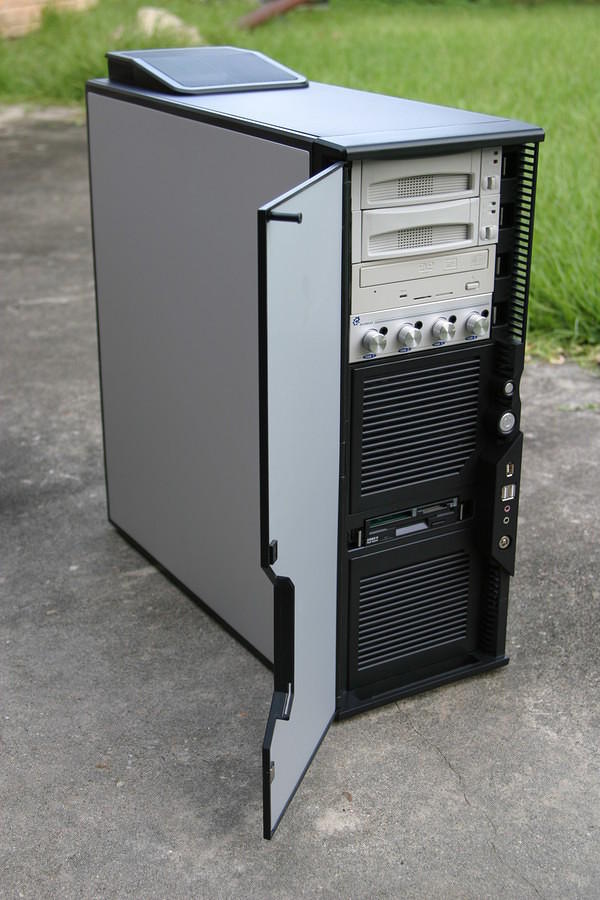
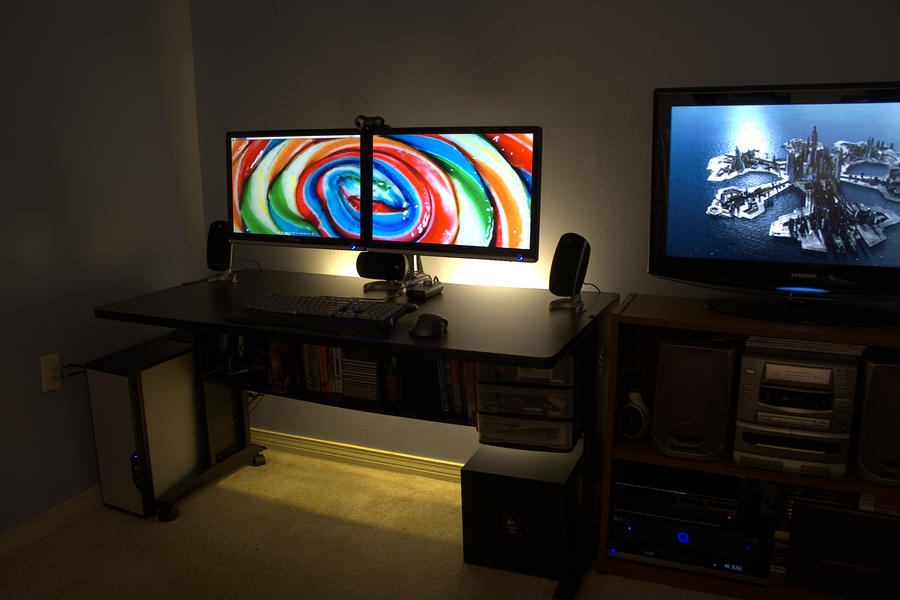
Finally, here is my case in its permanent home.
Thanks for looking. Constructive criticism welcome.
This is a pretty basic rig based on the Antec P180. Most of my purchasing decisions were made with the help of the fine people here. With the fans undervolted, the case is nearly silent, although a keen ear can detect the hard drives spinning. I recently worked up the courage to cut out the fan grills with a Dremel. I also modified the plastic doors covering the filters, allowing more airflow.
Parts List (complete):
Antec P180 Case
Seasonic S12-500 PSU
Asus A8N32-SLI Motherboard
AMD 4400 2.2ghz Athlon 64 Processor
with Scythe Ninja heatsink (semi-passive - CPU fan will usually be off)
eVGA (nVidia) 7800GT (256-P2-N519-AX)
with Arctic Cooling Accelero X1 VGA Cooler
Two (2) KINGSTON 1GB PC3200 RAM Modules KVR400X72C3A/1G
with Vantec heat spreaders
[edit 10/29/07]
Three Samsung HD501LJ 500GB Hard Drives
1 for OS, 2 for RAID 1 media storage
One empty IDE HD enclosure for occasional access of old drives.
[/edit]
Pioneer DVD-RW DL Optical Drive (DVR-108)
Three (3) YATE LOON 120mm Case Fans (D12SL-12)
undervolted to 5-7v by Sunbeam Rheobus fan controller
Creative X-Fi XtremeGamer Sound Card
Linksys WMP54GS PCI Wireless Card
Floppy Drive/Card Reader Combo
The Pictures:
I’ve tried to minimize any obstruction of airflow. Some cables such as the AC 12v CPU power plug are routed under the motherboard.
I also removed the top drive cage and tracks for the same purpose.
At the suggestion of some folks here I sealed the top fan grill with some clear, rigid plastic.
Although I find it hard to believe this would actually improve temps, keeping dust out is reason enough to close it off.
Recently I worked up the courage to remove the fan grills with my new Dremel XPR 400. I had the luxury of practicing on another P180 before grinding away at my own case. I also used a ‘blade sharpening’ attachment to smooth out the cuts a bit.
Perhaps the only modification making this topic worthwhile is the work I did on the fan filter doors. I took a Dremel and XACTO knife and removed some of the plastic, keeping the horizontal fins intact but removing the plastic behind it that impedes most of the airflow. This lets plenty of air in with no detriment to the cosmetic appearance. It took some practice before I figured out the cleanest method.
I used a Dremel at low speed ("3" on mine) and a standard cut off wheel. I made the cuts with the door front face down. With a ruler and XACTO knife, I made a line marking my best guess as to where the top edge of each fin would be (1/16th of a inch from the bottom of the fin). With that as a guide, I started my cut my easing the running dremel onto the edge of the line I made. Once comfortable with the cut-off wheel placement, I pushed gently on the door, leaving, holding the dremel stationary (much like a table saw. Since the wheel is round (duh) I did not make the horizontal cuts all the way to the end. It's worth noteing that you need only let the wheel sink about 2mm into the plastic. To finish each one, I first 'shaved' off the excess plastic that accumulates on the sides of the cuts, then finished the job by cutting to the ends, and then making small vertical slices along either side. I also did some touchup as needed with the XACTO knife. Repeat a dozen times.
I found this work to be very time-consuming but worthwhile. I did the top and bottom doors several months apart. During the second time around, I found it easier to mark all the lines, then do all the dremel cuts and then do the final touchup work. That way, you can get "in the groove" (sorry I can't think of a better phrase), make good cuts consistantly and be done with the noise making. With only the XACTO work ahead of you, you can half pay attention to the TV or whatever and the work won't seem quite so tedius.
I also inserted some black construction paper here to stop light leaks from the power/disk LEDs... just another anal fix.
Finally, here is my case in its permanent home.
Thanks for looking. Constructive criticism welcome.