Lian Li PC60 gets the treatment
Posted: Sat Dec 13, 2008 10:19 pm
Update 1/5/09
I changed quite a few things during the last month and have ended up with the following configuration:
Q8300 on a Gigabyte EP43DS3,Asus 9600gt, a Momentus 7200.3 for storage and a Vertex for my programs. I also changed the cpu/exhaust fan to a skythe kama pwm as the gigabyte board won`t control analog fans.
I needed the extra processing power of the 8300. Unfortunately I killed the motherboard while I was mounting it back in so I had to replace that too. Temperatures have gone up by several degrees though that has more to do with the hot summer weather.
The system is still inaudible 90% of the time though I can hear the exhaust fan ramping up when the cpu is under load. The controller on my new mobo is a little too sensitive.
As for the kama pwm, I think it is THE pwm fan to have. It has one of the smoothest motors I`ve even heard up ther ewith the best (nexus, sflex). Just get the model without the clear blades.
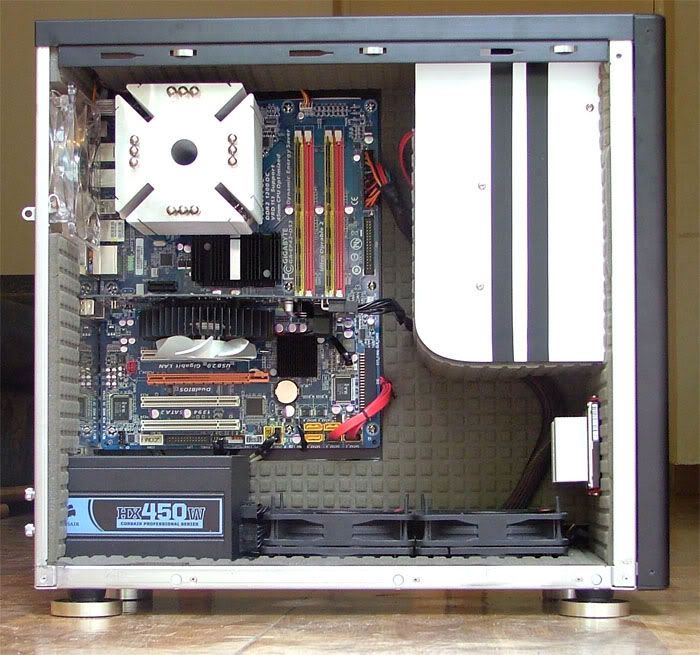
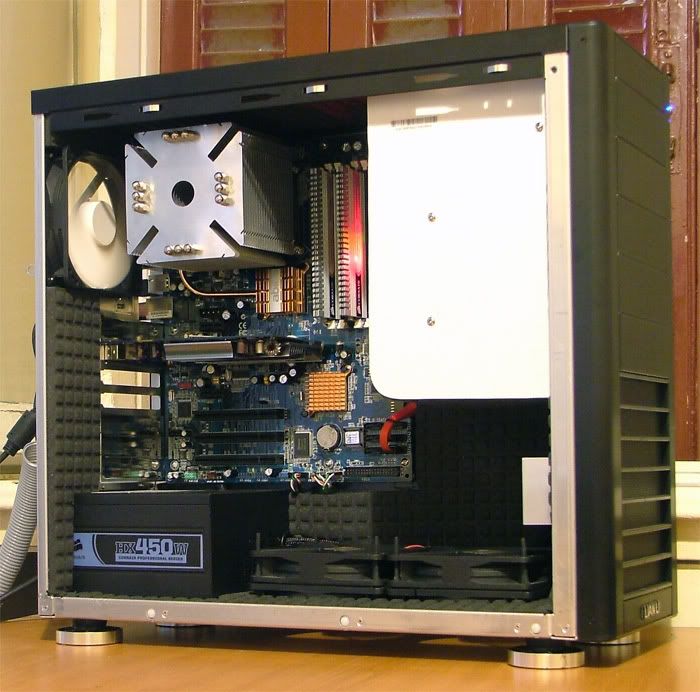
Right, so this is how my rig looks now:
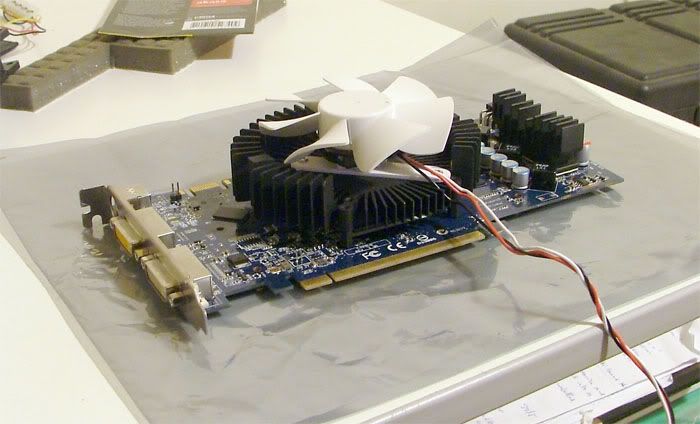
I forgot to mention that I swapped the fan of the 9600 with a nexus 92mm. It`s been regulated by the motherboard to a nice 900rpm. I had no chance to stress the gpu so far but it idles at 45 degrees.
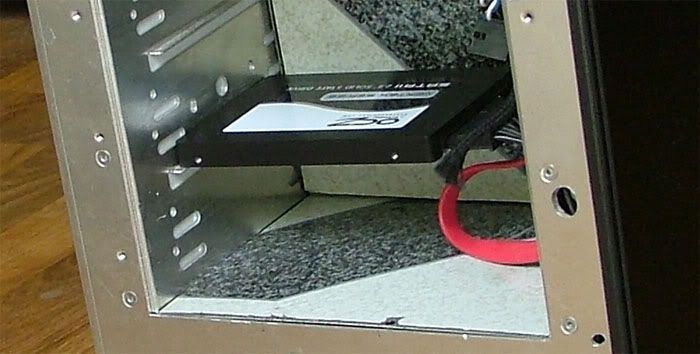
And the ssd hidden under the optical drive:
Update 1/5/09
I finally upgraded my machine to something more modern. While some parts are still missing the essentials are there so I had the chance to take some pictures of the machine running and do some tests.
I did carry out some minor modifications to the case. While thermally and acoustically it was a success, adding or removing components was a major PITA. I created some extra space at the front of the case while a modular power supply with long cables made cable management much easier. I`m still working an a removable dust filter system.
The new system is a core 2 8400 on an abit p35 and a passive 7600gs soon to be replaced with a 4770. Since it`s producing considerably less heat then my athlon xp rig I could further slow down the fans and still improve my temperatures.
The twin intake fans are now permanently running at 5 volts. The exhaust is regulated by the motherboard to a nice 400rpm and ramps up on demand though so far this has never happened even when overclocking to 3.6ghz. At the time of testing room temperature was at 24 degrees.
Temps for the cpu are 40 idle, 50 load and 52 load @ 3.6ghz while the power circuitry runs at 45 when stressed. CPU voltage is the lowest I could set in RMclock: 1.15volts. I haven`t stressed the gpu so far and probably never will but it idles at 46 degrees. The hdd runs at ambient temps as aways.
I`m pretty pleased with the abit board so far. While slightly outdated, it`s fan control options are second only to the ip35 pro and has funcional heatsinks on all the major components. Not bad for 45 eurobucks.
There are some bad news however: 2 of the 3 nexus fans are showing signs of damage. Their propelers move about the y axis (x being the airflow direction) which is strange since they seemed perfectly balanced when I got them and have not suffered any shock ever since.
Update 16/12/08
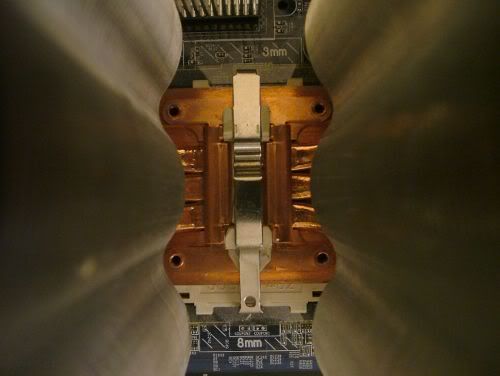
The chilly weather of the last few days is keeping people inside giving me the opportunity to do a noise test. I noticed that even at 5 volts the cpu fan was audible. At the same time I couldn`t stand staring at the sonic tower abandoned in my closet.. So in spite of the problems I had before I gave it one more try. I experimented with different clips and suspension setups trying to distribute the forces on the socket more evenly. After the nerve wrecking experience of remounting the cooler half a dozen times, I chose the setup that gave me the best temperatures and most even thermal paste imprint.
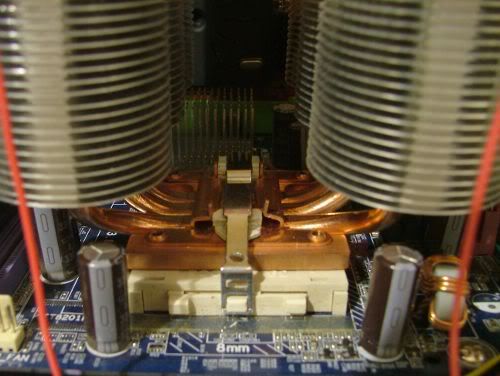
I have to say, I missed my heatpipe cooler!
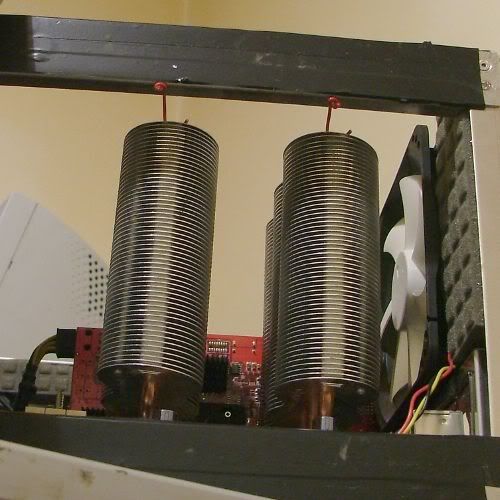
After switching to the tower cooler I didn`t have to worry about the cpu fan anymore. The same 8cm on the gpu didn`t seem to bother me probably because of the different orientation. I did have to turn the nexus exhaust all the way down to 5 volts while the two intakes could stay at 6. So that was it, this computer is now inaudible under the quietest conditions I`ve come across.
All temperatures improved compared to my last setup. The gpu is now 7 degrees cooler and even the cpu dropped it`s temp by a couple of degrees even though it`s passive heatsink does not receive any help from the psu anymore. The northbridge and southbridge are also cooler, I can touch them for several seconds without burning myself, something that wasn`t possible before.
CPU : 44 (47@ Load)
VGA : 41
HDD : 23
I think the dual intake and unrestricted exhaust made a considerable difference, I can feel airflow where it was absent before and most importantly, this improvement didn`t come at the cost of increased noise.
[/b]Update 14/12/08[/b]
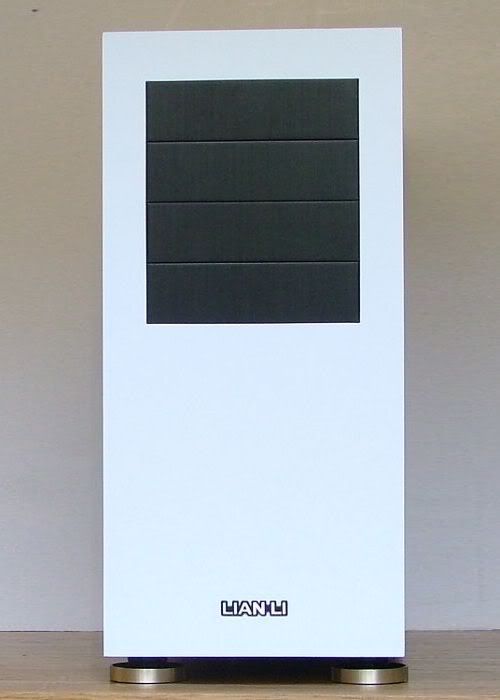
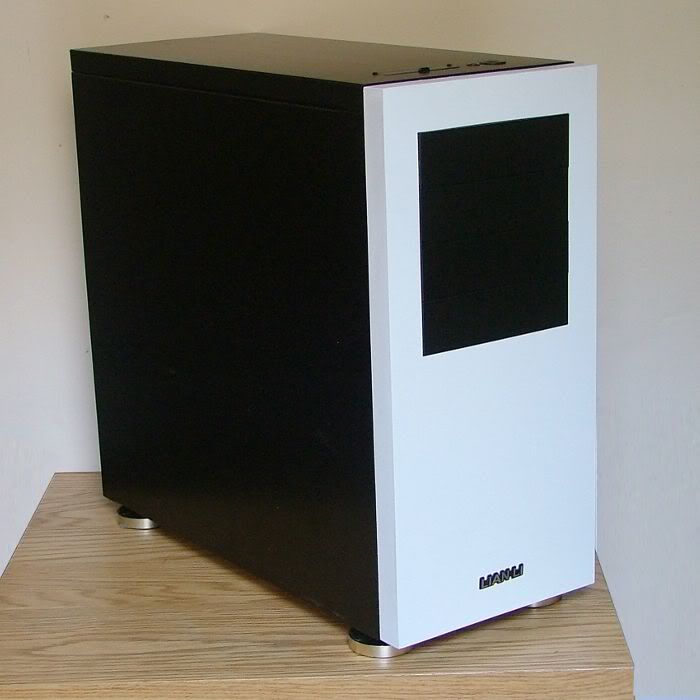
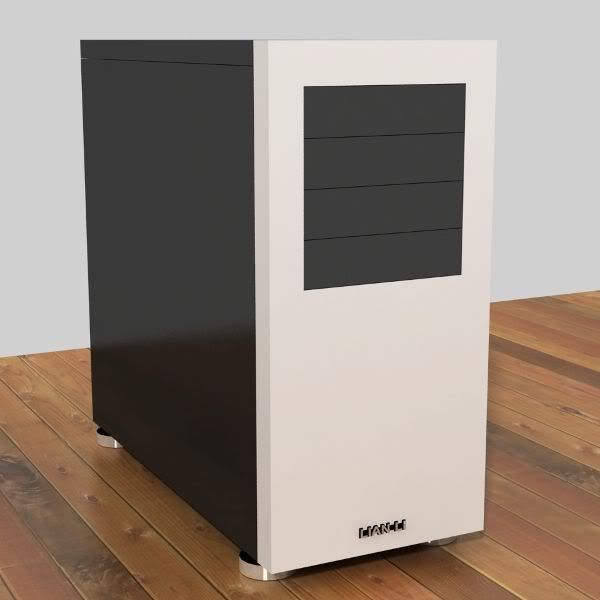
I was so close to finishing that I just couldn`t sleep in spite of being sleepless for 24 hours. So I made myself a cup of coffee and after some lapping I got the front bezel to a satisfactory finish, aligned it and took some pictures in daylight:
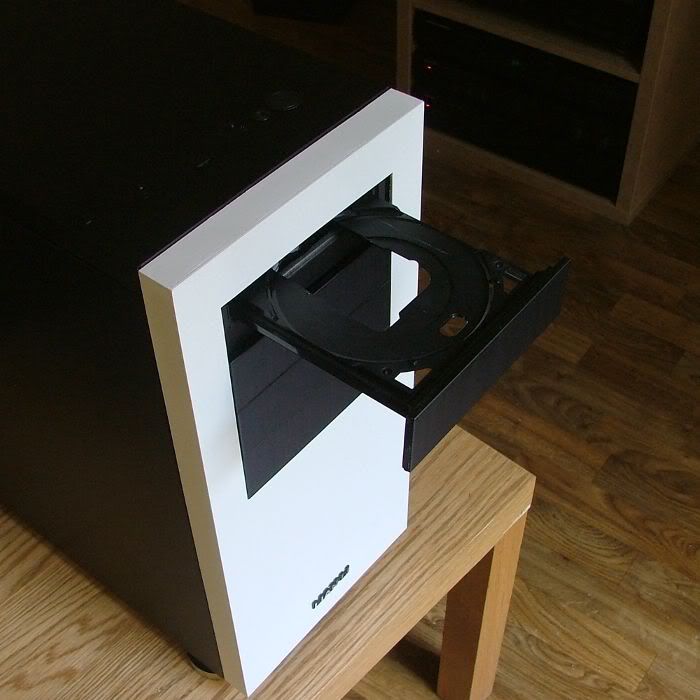
Yes, there is an optical drive after all! It opens with what used to be the reset button:
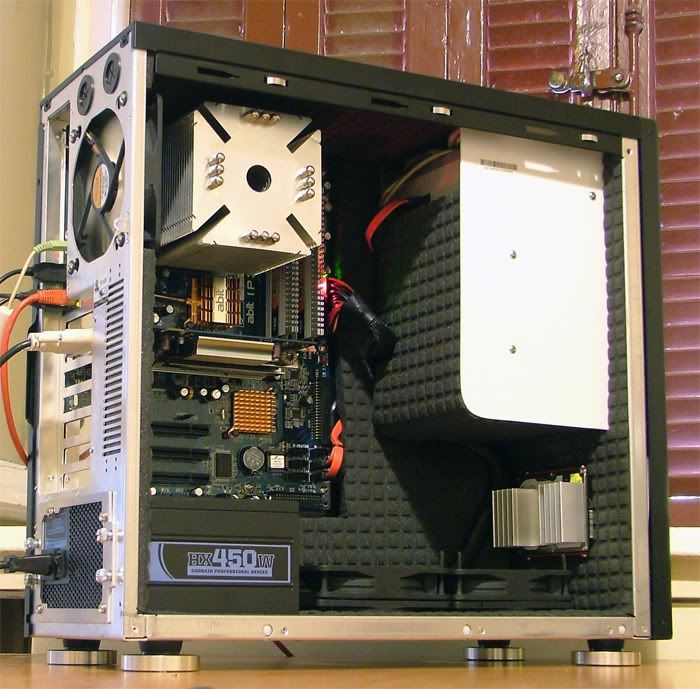
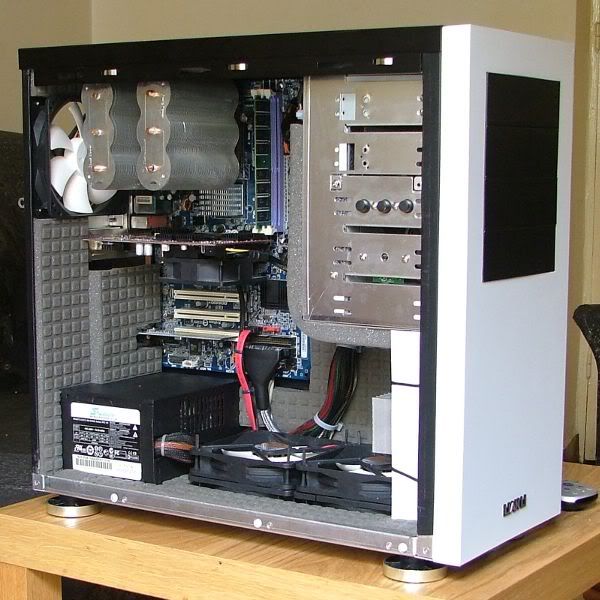
And finally the interior:
Greetings,
While I have been putting off upgrading my crammy athlon xp, waiting for my favorite parts to become available, I needed something to keep my hands busy.So I got myself a new case.
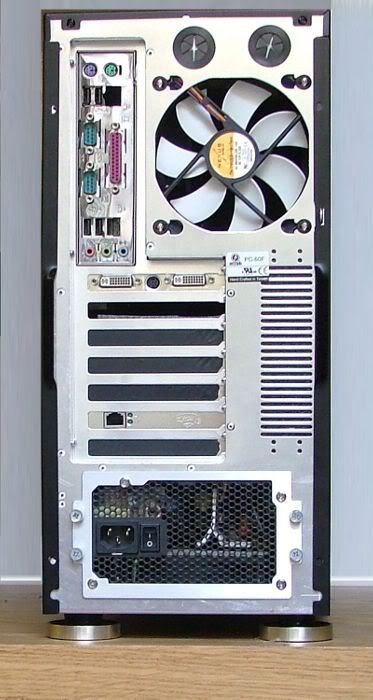
I`m getting a bit too fussy lately and as a result there exists no case that I would call ideal. Of course no one stops me from modifying an existing design and I though the Lian Li pc60 was a very good starting point.
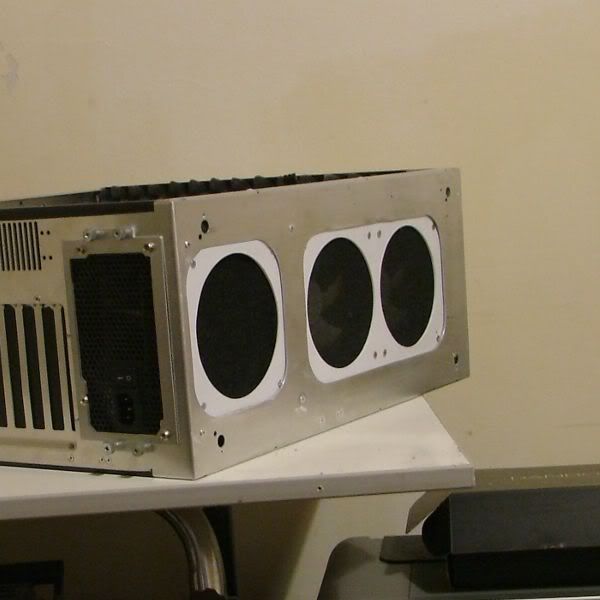
The main modification was that of the cooling layout. In the past I experimented with completely sealing the front of the case and it was very effective in reducing noise. Unfortunately, with no intake fans, system cooling was far from optimal. My plan was to make a positive pressure setup with a dual intake at the bottom of the case. While at it, I added a third intake for the bottom mounted psu.
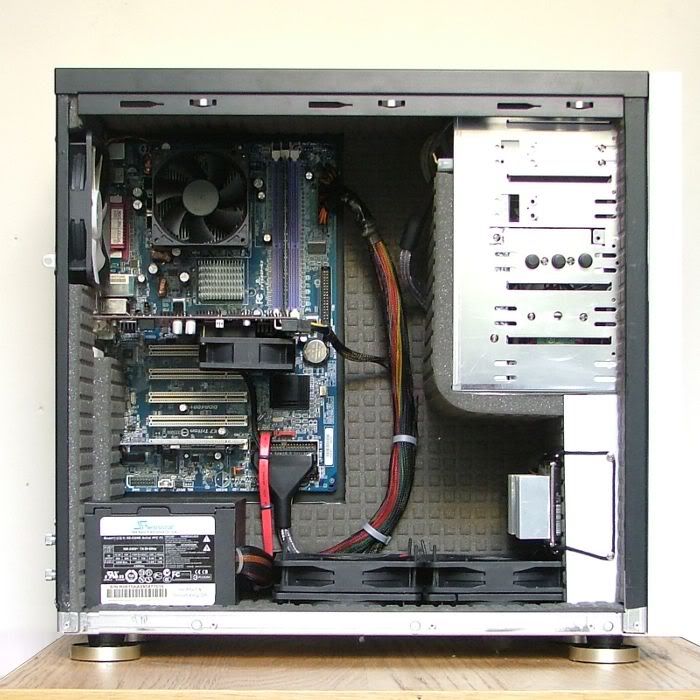
Next is dampening the case. I have had moderate success with acoustic foam and now I wanted to take it to the next level: using a mass barrier along with the foam.
The last main mod is that of the exterior. Even though Lian Lis are known for their clean and uncluttered looks I wanted something even more minimal. So I`m working on a custom bezel and so far it`s looking good.
So, time for a walkthrough of the work in progress:
The tools:
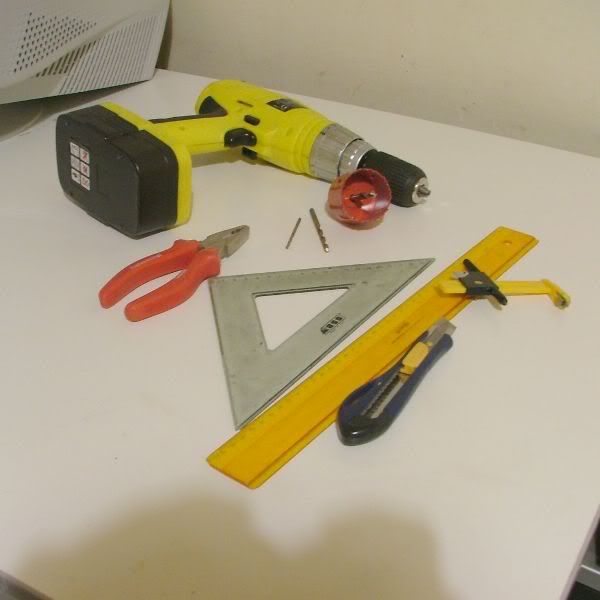
As you can see I have a limited collection of tools and even more limited experience in working with metal. My last job of cutting metal looked a lot like this:
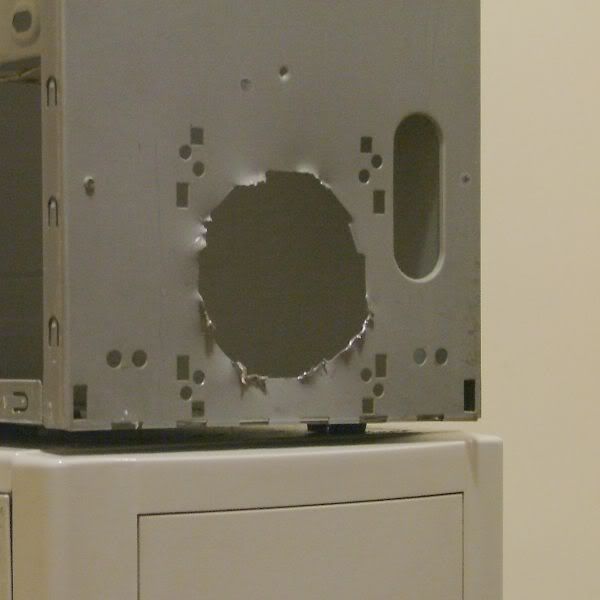
This time I wanted to do it right. I wanted my case to look good from any side (I`m vain, I know!). So I figured I`d try using a hole saw to create some nicely rounded corners and then a stanley knife (and lots of patience) to cleanly cut the sides.
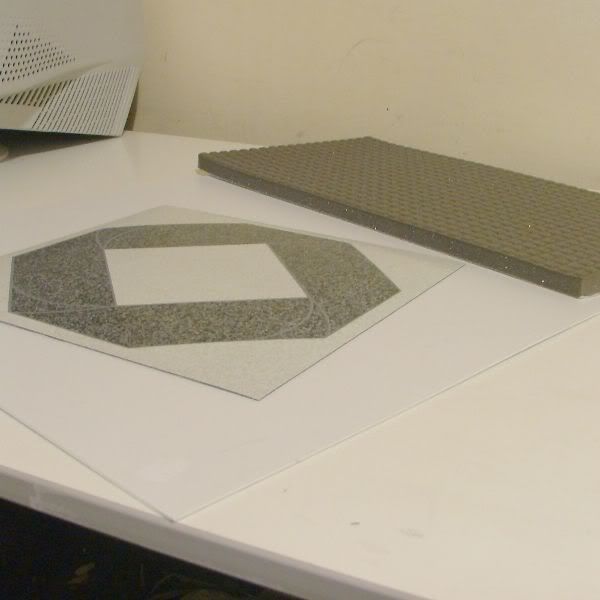
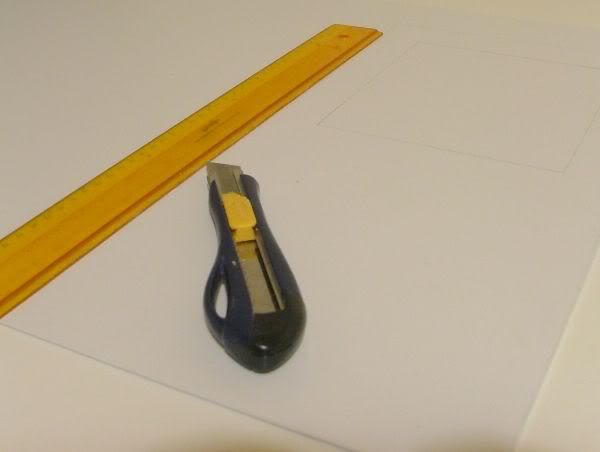
I forgot to take pictures while doing it, but I repeated the proccess on a plastic sheet:
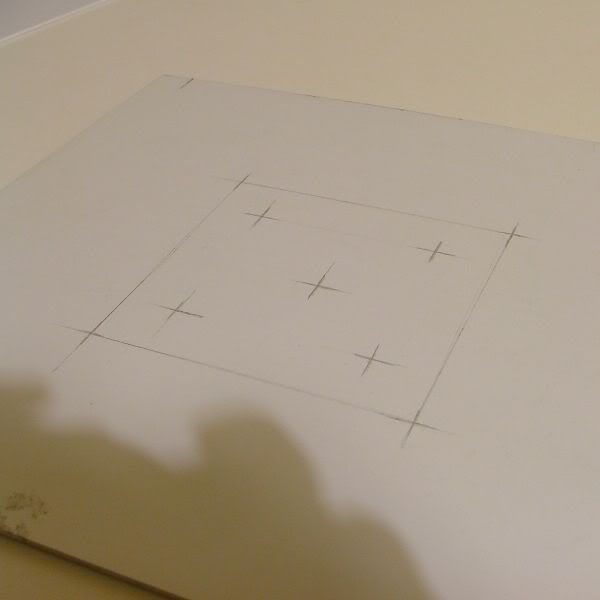
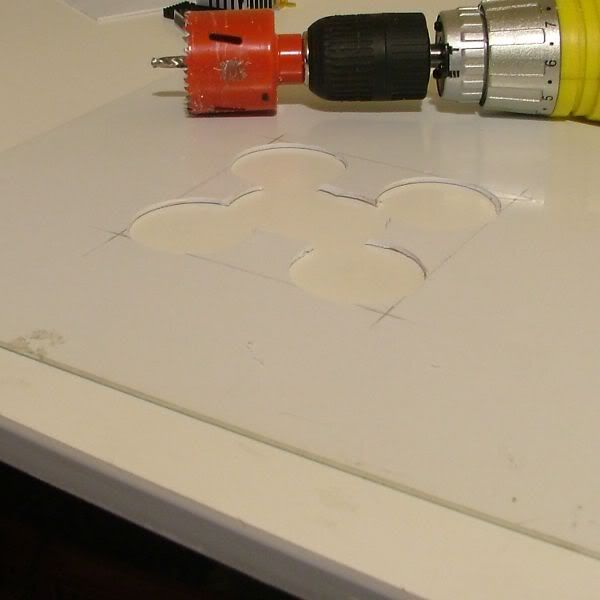
First I did the rounded corners using a hole saw:
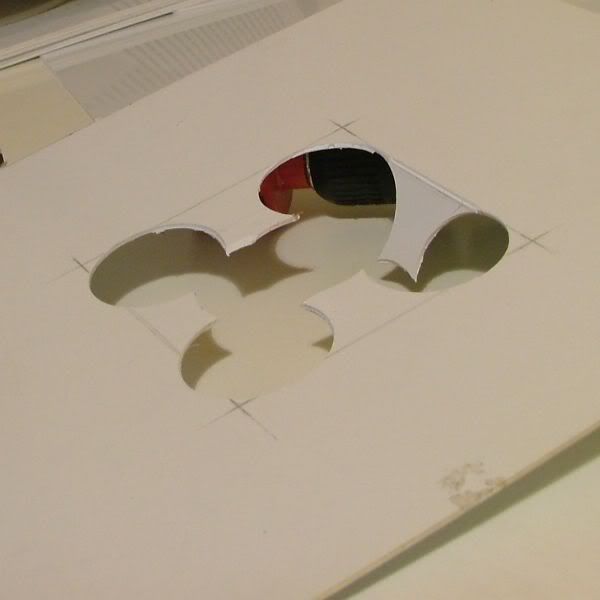
Then it`s a matter of connecting them. I made slices with a stanley knife until I could snap the remaining pieces off:
I attached some sanding paper on the drill bit to clean the rounded corners:
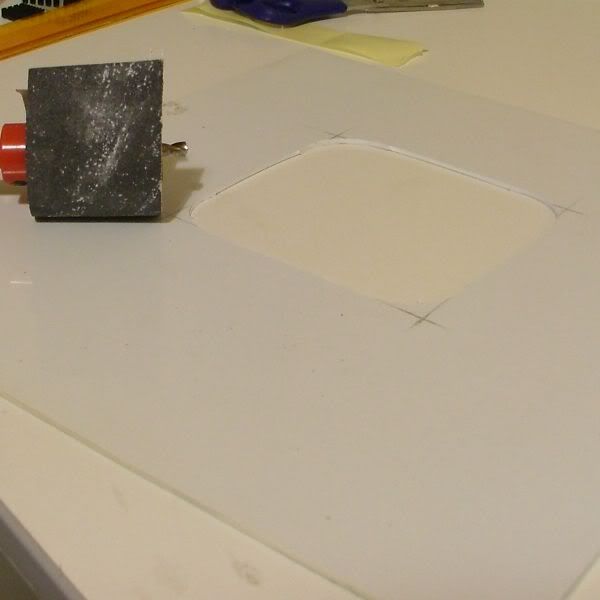
And here`s the actual result. I`m surprised I could actually pull this off.
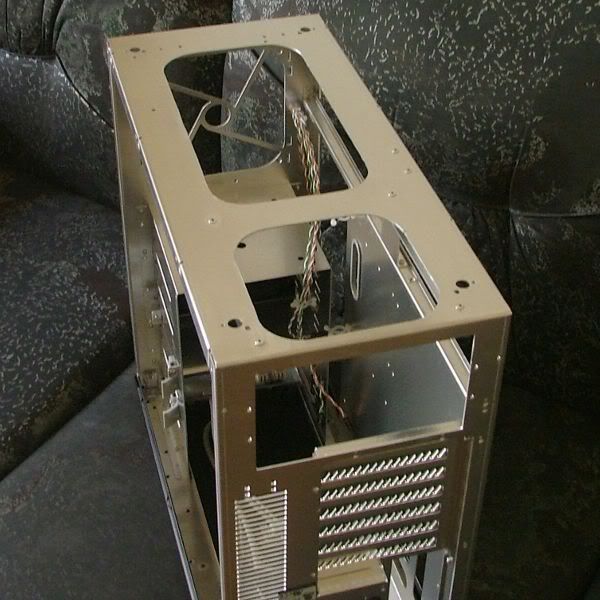
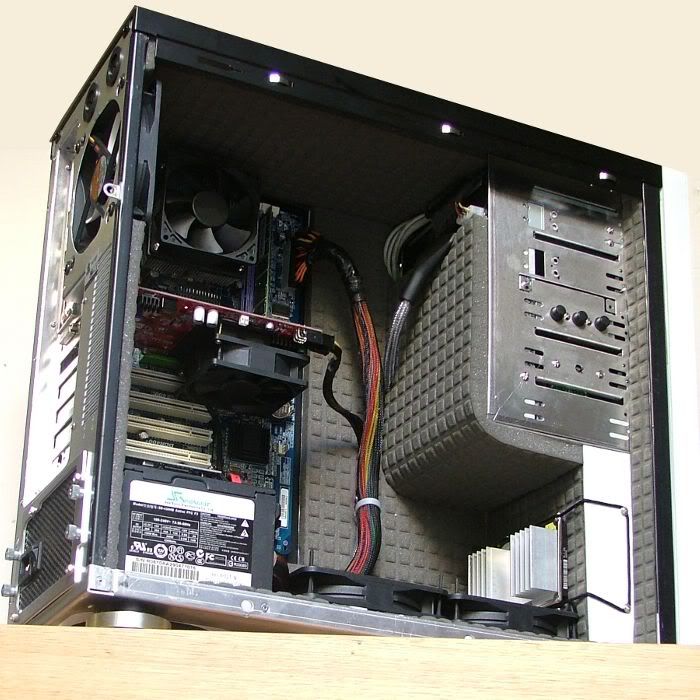
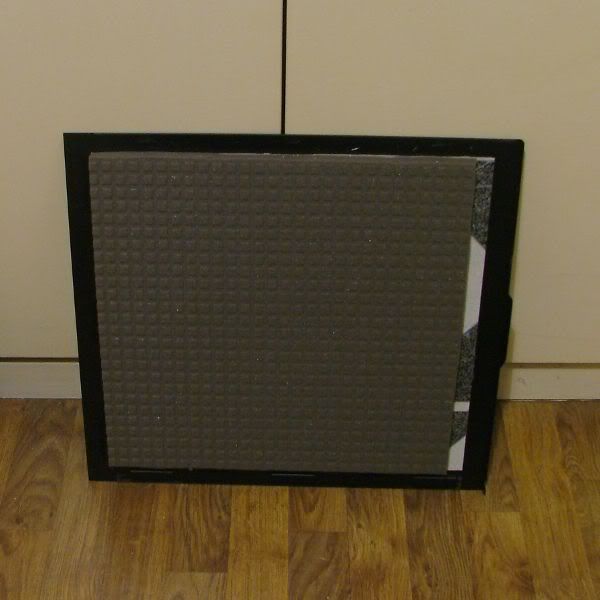
Instead of attaching the fans directly on the chassis, I made a removable secondary floor:
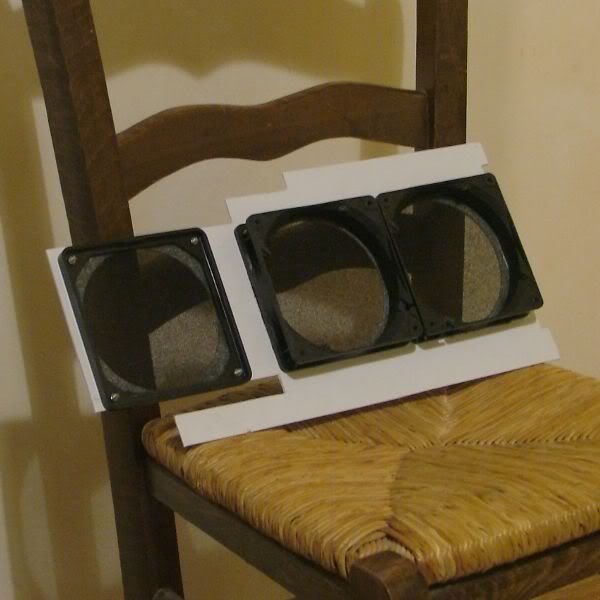
The filters looks pretty unrestrictive:
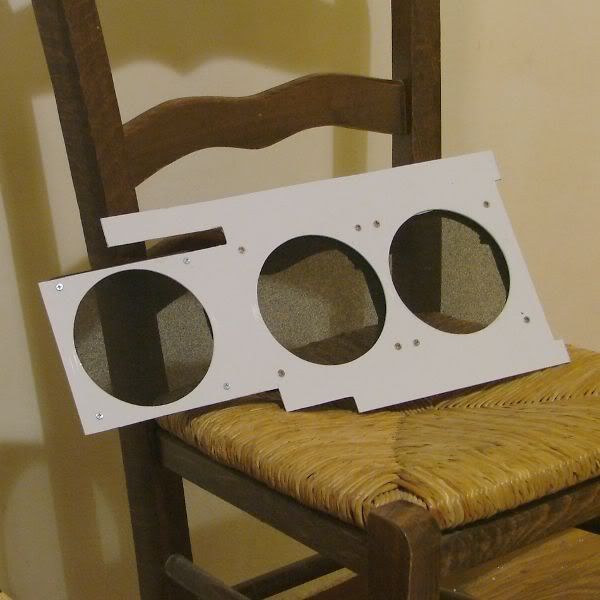
The bottom of the case with the fans in place:
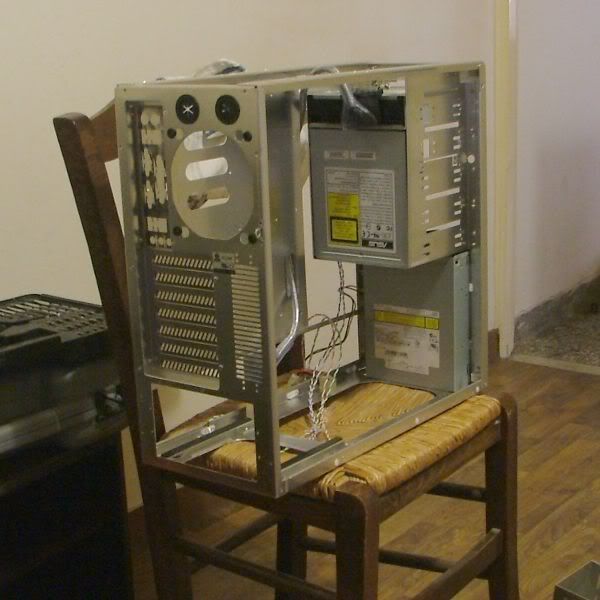
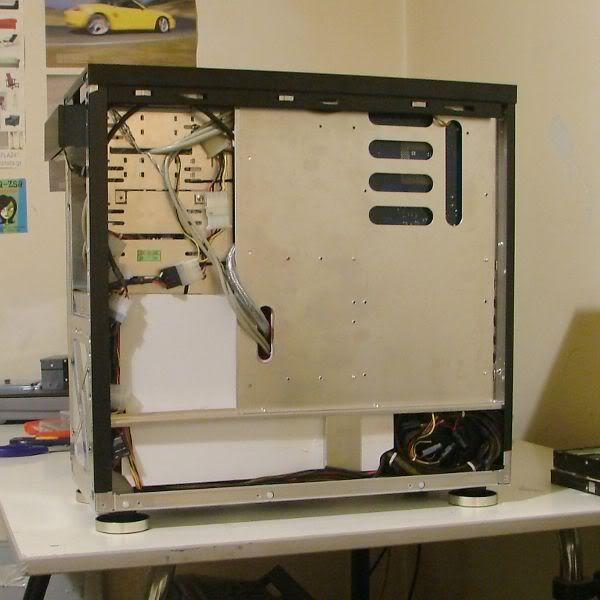
With that done I went on to dampen the case. Those are some of the materials I used for the job:
First I completely blocked the front of the case by using a couple of old cd roms and a 3.5inch hard drive:
All eligible surfaces were covered with two layers of vinyl tiles:
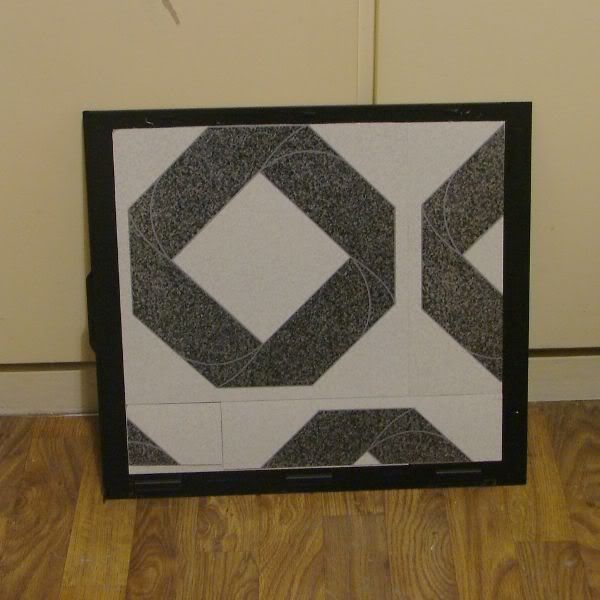
And then a layer of 1cm thick acoustic foam:
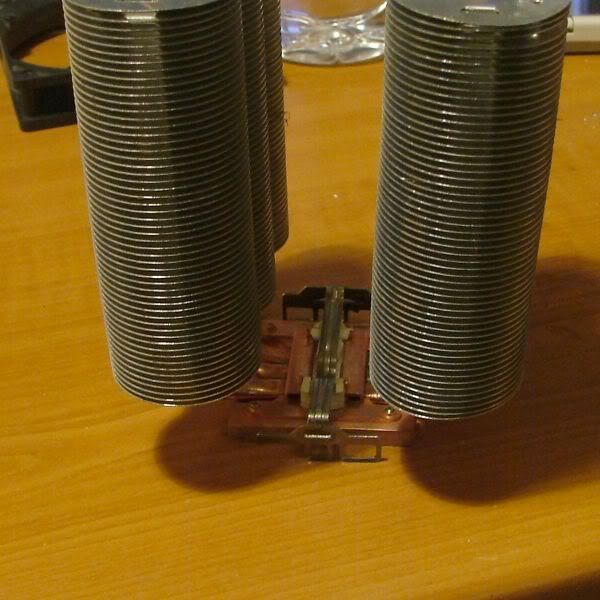
Before moving on to the custom bezel I wanted to improve cooling a bit further. With ambient temperature reaching up to 40 degrees in summer, many small components like the northbridge and various mosfets get too hot to touch. I ditched my tower heatsink and went back to my old cooler. While the sonic tower could passively cool my cpu, I ended up needing an extra fan on the northbridge and I`d rather have a smooth 8cm fan than a whiny 4cm one. The other problem was that the improvised mounting system didn`t really work. Even after suspending the weight of the heatsink, the metal clip used would loosen over time, sending my temps to unhealthy levels. I`d rather not have to go through the nightmare of remounting it so that sealed my decision.
Improvised socket A mounting system for the sonic tower. Unfortunately it didn`t wok in the long term.
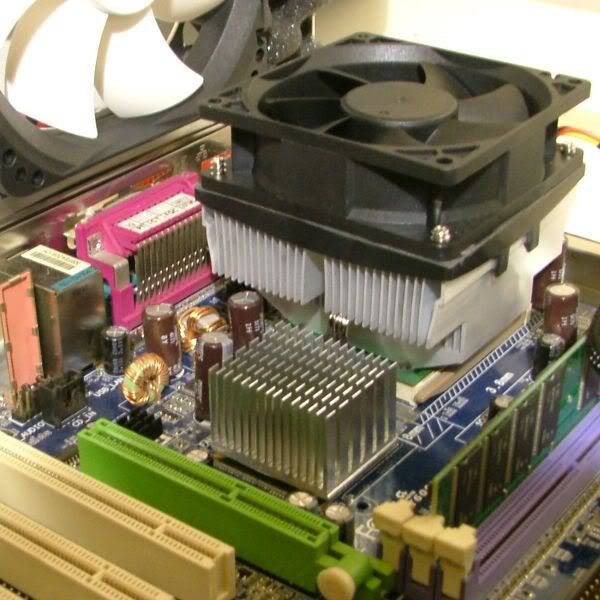
The arctic cooling fan was sawn off and a more conventional design takes it`s place:
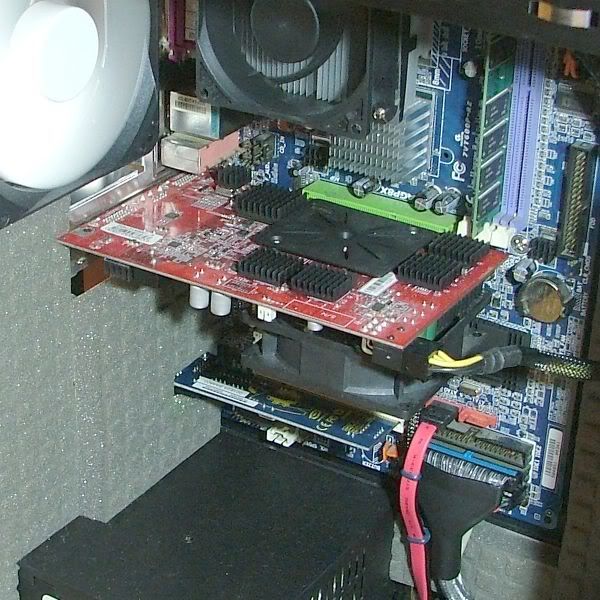
Various heatsinks hacked, filed and lapped:
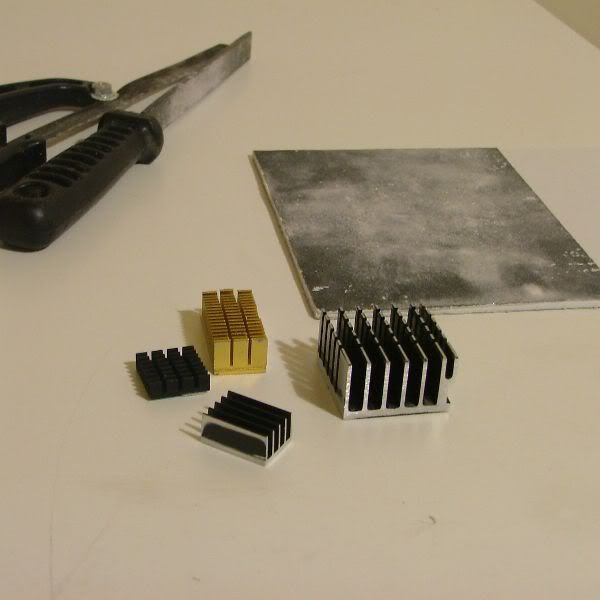
Then get attached to various locations on the motherboard and gpu:
Some cable managment on the backside:
And a couple of fan controllers: a three channel akasa and the switch that came with my first Lian Li.

Ok, so on the the final step. The front bezel I planned to make is a really simple affair: a very basic shape made out of polystyrene sheets. I made a quick template out of cardboard and then cut the various sides.
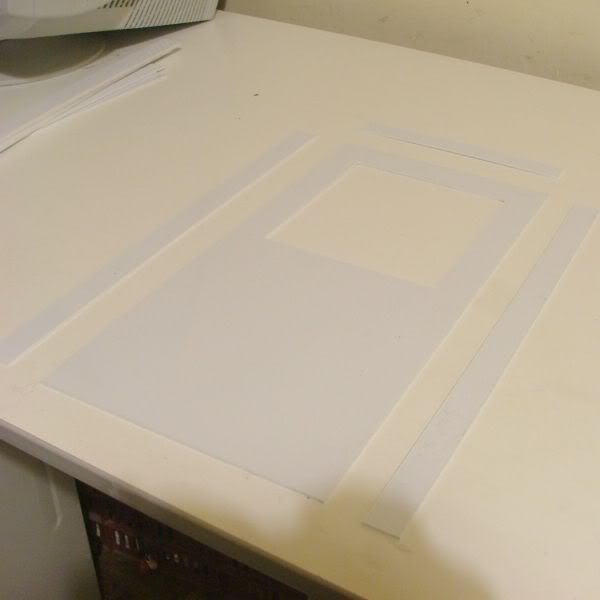
Sanding paper attached to a flat surface was very handy in cleaning up the edges while keeping them straight:
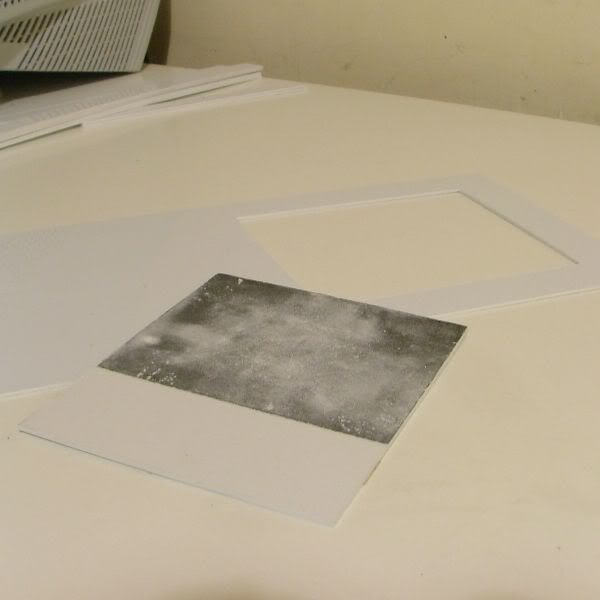
"Ribs" on each side keep the whole thing together:
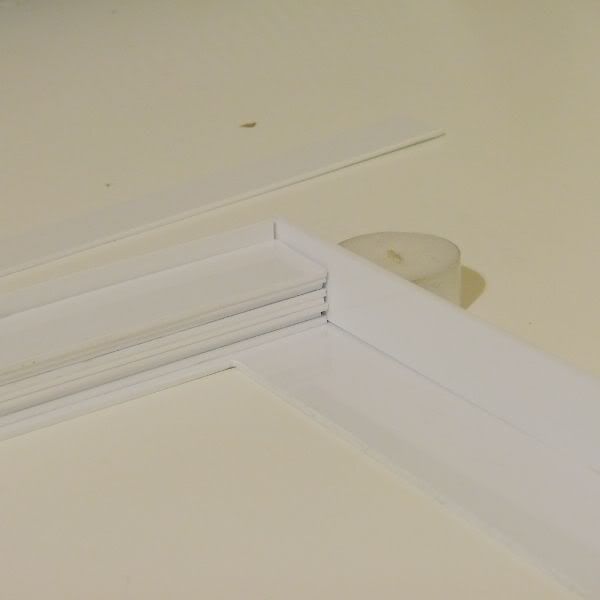
A lot of effort was put in making the joints as seamless as possible:
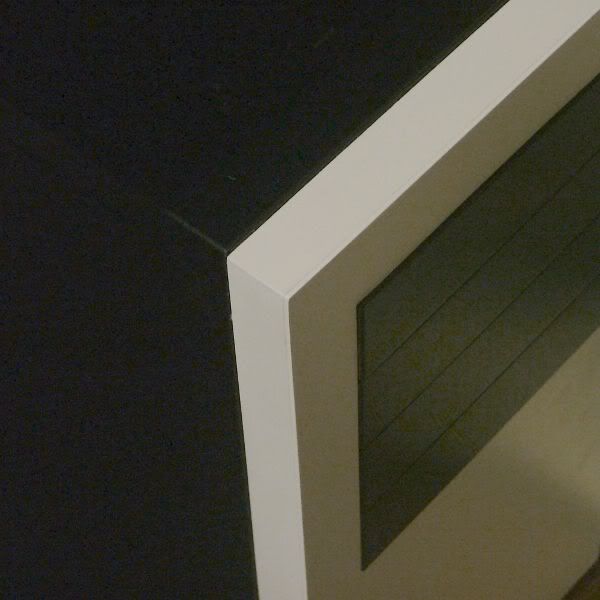
And this where I've got so far. I`ve spend all night working on it and I think I need to get some sleep. Hopefully tommorow I can finish the bezel and post the end result.
In the meantime here`s a preview:
 [/img]
I changed quite a few things during the last month and have ended up with the following configuration:
Q8300 on a Gigabyte EP43DS3,Asus 9600gt, a Momentus 7200.3 for storage and a Vertex for my programs. I also changed the cpu/exhaust fan to a skythe kama pwm as the gigabyte board won`t control analog fans.
I needed the extra processing power of the 8300. Unfortunately I killed the motherboard while I was mounting it back in so I had to replace that too. Temperatures have gone up by several degrees though that has more to do with the hot summer weather.
The system is still inaudible 90% of the time though I can hear the exhaust fan ramping up when the cpu is under load. The controller on my new mobo is a little too sensitive.
As for the kama pwm, I think it is THE pwm fan to have. It has one of the smoothest motors I`ve even heard up ther ewith the best (nexus, sflex). Just get the model without the clear blades.
Right, so this is how my rig looks now:
I forgot to mention that I swapped the fan of the 9600 with a nexus 92mm. It`s been regulated by the motherboard to a nice 900rpm. I had no chance to stress the gpu so far but it idles at 45 degrees.
And the ssd hidden under the optical drive:
Update 1/5/09
I finally upgraded my machine to something more modern. While some parts are still missing the essentials are there so I had the chance to take some pictures of the machine running and do some tests.
I did carry out some minor modifications to the case. While thermally and acoustically it was a success, adding or removing components was a major PITA. I created some extra space at the front of the case while a modular power supply with long cables made cable management much easier. I`m still working an a removable dust filter system.
The new system is a core 2 8400 on an abit p35 and a passive 7600gs soon to be replaced with a 4770. Since it`s producing considerably less heat then my athlon xp rig I could further slow down the fans and still improve my temperatures.
The twin intake fans are now permanently running at 5 volts. The exhaust is regulated by the motherboard to a nice 400rpm and ramps up on demand though so far this has never happened even when overclocking to 3.6ghz. At the time of testing room temperature was at 24 degrees.
Temps for the cpu are 40 idle, 50 load and 52 load @ 3.6ghz while the power circuitry runs at 45 when stressed. CPU voltage is the lowest I could set in RMclock: 1.15volts. I haven`t stressed the gpu so far and probably never will but it idles at 46 degrees. The hdd runs at ambient temps as aways.
I`m pretty pleased with the abit board so far. While slightly outdated, it`s fan control options are second only to the ip35 pro and has funcional heatsinks on all the major components. Not bad for 45 eurobucks.
There are some bad news however: 2 of the 3 nexus fans are showing signs of damage. Their propelers move about the y axis (x being the airflow direction) which is strange since they seemed perfectly balanced when I got them and have not suffered any shock ever since.
Update 16/12/08
The chilly weather of the last few days is keeping people inside giving me the opportunity to do a noise test. I noticed that even at 5 volts the cpu fan was audible. At the same time I couldn`t stand staring at the sonic tower abandoned in my closet.. So in spite of the problems I had before I gave it one more try. I experimented with different clips and suspension setups trying to distribute the forces on the socket more evenly. After the nerve wrecking experience of remounting the cooler half a dozen times, I chose the setup that gave me the best temperatures and most even thermal paste imprint.
I have to say, I missed my heatpipe cooler!
After switching to the tower cooler I didn`t have to worry about the cpu fan anymore. The same 8cm on the gpu didn`t seem to bother me probably because of the different orientation. I did have to turn the nexus exhaust all the way down to 5 volts while the two intakes could stay at 6. So that was it, this computer is now inaudible under the quietest conditions I`ve come across.
All temperatures improved compared to my last setup. The gpu is now 7 degrees cooler and even the cpu dropped it`s temp by a couple of degrees even though it`s passive heatsink does not receive any help from the psu anymore. The northbridge and southbridge are also cooler, I can touch them for several seconds without burning myself, something that wasn`t possible before.
CPU : 44 (47@ Load)
VGA : 41
HDD : 23
I think the dual intake and unrestricted exhaust made a considerable difference, I can feel airflow where it was absent before and most importantly, this improvement didn`t come at the cost of increased noise.
[/b]Update 14/12/08[/b]
I was so close to finishing that I just couldn`t sleep in spite of being sleepless for 24 hours. So I made myself a cup of coffee and after some lapping I got the front bezel to a satisfactory finish, aligned it and took some pictures in daylight:
Yes, there is an optical drive after all! It opens with what used to be the reset button:
And finally the interior:
Greetings,
While I have been putting off upgrading my crammy athlon xp, waiting for my favorite parts to become available, I needed something to keep my hands busy.So I got myself a new case.
I`m getting a bit too fussy lately and as a result there exists no case that I would call ideal. Of course no one stops me from modifying an existing design and I though the Lian Li pc60 was a very good starting point.
The main modification was that of the cooling layout. In the past I experimented with completely sealing the front of the case and it was very effective in reducing noise. Unfortunately, with no intake fans, system cooling was far from optimal. My plan was to make a positive pressure setup with a dual intake at the bottom of the case. While at it, I added a third intake for the bottom mounted psu.
Next is dampening the case. I have had moderate success with acoustic foam and now I wanted to take it to the next level: using a mass barrier along with the foam.
The last main mod is that of the exterior. Even though Lian Lis are known for their clean and uncluttered looks I wanted something even more minimal. So I`m working on a custom bezel and so far it`s looking good.
So, time for a walkthrough of the work in progress:
The tools:
As you can see I have a limited collection of tools and even more limited experience in working with metal. My last job of cutting metal looked a lot like this:
This time I wanted to do it right. I wanted my case to look good from any side (I`m vain, I know!). So I figured I`d try using a hole saw to create some nicely rounded corners and then a stanley knife (and lots of patience) to cleanly cut the sides.
I forgot to take pictures while doing it, but I repeated the proccess on a plastic sheet:
First I did the rounded corners using a hole saw:
Then it`s a matter of connecting them. I made slices with a stanley knife until I could snap the remaining pieces off:
I attached some sanding paper on the drill bit to clean the rounded corners:
And here`s the actual result. I`m surprised I could actually pull this off.
Instead of attaching the fans directly on the chassis, I made a removable secondary floor:
The filters looks pretty unrestrictive:
The bottom of the case with the fans in place:
With that done I went on to dampen the case. Those are some of the materials I used for the job:
First I completely blocked the front of the case by using a couple of old cd roms and a 3.5inch hard drive:
All eligible surfaces were covered with two layers of vinyl tiles:
And then a layer of 1cm thick acoustic foam:
Before moving on to the custom bezel I wanted to improve cooling a bit further. With ambient temperature reaching up to 40 degrees in summer, many small components like the northbridge and various mosfets get too hot to touch. I ditched my tower heatsink and went back to my old cooler. While the sonic tower could passively cool my cpu, I ended up needing an extra fan on the northbridge and I`d rather have a smooth 8cm fan than a whiny 4cm one. The other problem was that the improvised mounting system didn`t really work. Even after suspending the weight of the heatsink, the metal clip used would loosen over time, sending my temps to unhealthy levels. I`d rather not have to go through the nightmare of remounting it so that sealed my decision.
Improvised socket A mounting system for the sonic tower. Unfortunately it didn`t wok in the long term.
The arctic cooling fan was sawn off and a more conventional design takes it`s place:
Various heatsinks hacked, filed and lapped:
Then get attached to various locations on the motherboard and gpu:
Some cable managment on the backside:
And a couple of fan controllers: a three channel akasa and the switch that came with my first Lian Li.
Ok, so on the the final step. The front bezel I planned to make is a really simple affair: a very basic shape made out of polystyrene sheets. I made a quick template out of cardboard and then cut the various sides.
Sanding paper attached to a flat surface was very handy in cleaning up the edges while keeping them straight:
"Ribs" on each side keep the whole thing together:
A lot of effort was put in making the joints as seamless as possible:
And this where I've got so far. I`ve spend all night working on it and I think I need to get some sleep. Hopefully tommorow I can finish the bezel and post the end result.
In the meantime here`s a preview:
[/img]