Apex MI-008 + Zotac 9300 ITX Wifi
Posted: Mon May 04, 2009 7:45 pm
So, after 2.5 months of reading, watching, planning, sketching, and labor, my baby is ready to be unveiled.
Zotac 9300-d-e (GeForce 9300 ITX Wifi)
Intel E8400
Apex MI-008
Hitachi 320 GB 7200 RPM 2.5" drive
DVD burner
PicoPSU 120 + brick
Thermalright XP-90 (modded)
Scythe 120mm PWM Fan
Backstory:
I dabbled in silence on my previous (first) computer build; an old AMD XP 2200+ built 5+ years ago. After having this hulking beast
taking up so much space under my desk, and seemingly getting louder and louder over the years, I decided that I wanted to go as
small & as silent as possible.
I don't do a lot of gaming and only rarely dabble in video editing, so this PC will be my everyday everything PC. Some
Illustrator, some video editing, online flash games, etc. With any luck, this PC will last me at least another 3-4 years.
After its useful life, it'll be small enough to port to any number of applications.
After some research, I settled on the components above.
Here is the photo story.
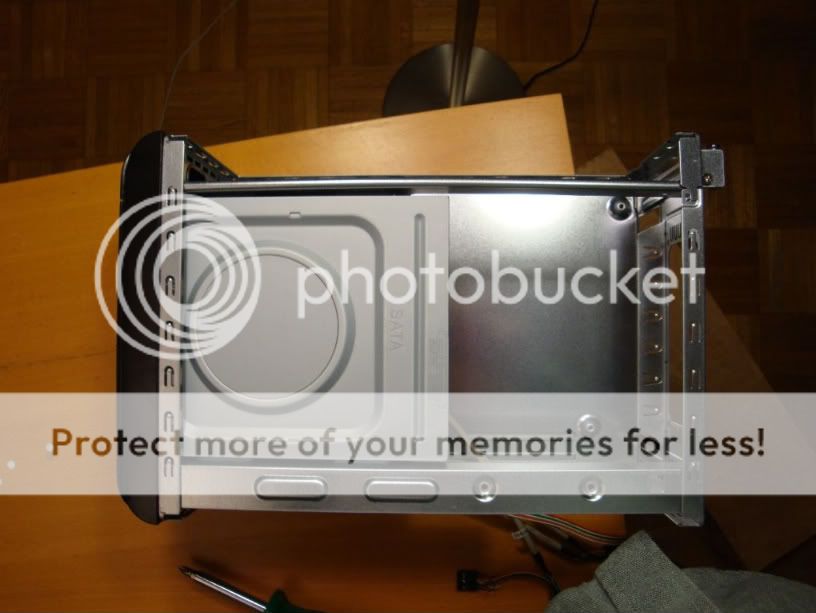
The Apex MI-008 is a beautiful case...shiny bezel, black finish, and plenty of room inside once the stock power supply is removed.


Beer scale!


Reference photos for those interested in possibly fitting a blu-ray into this case using stock PS..
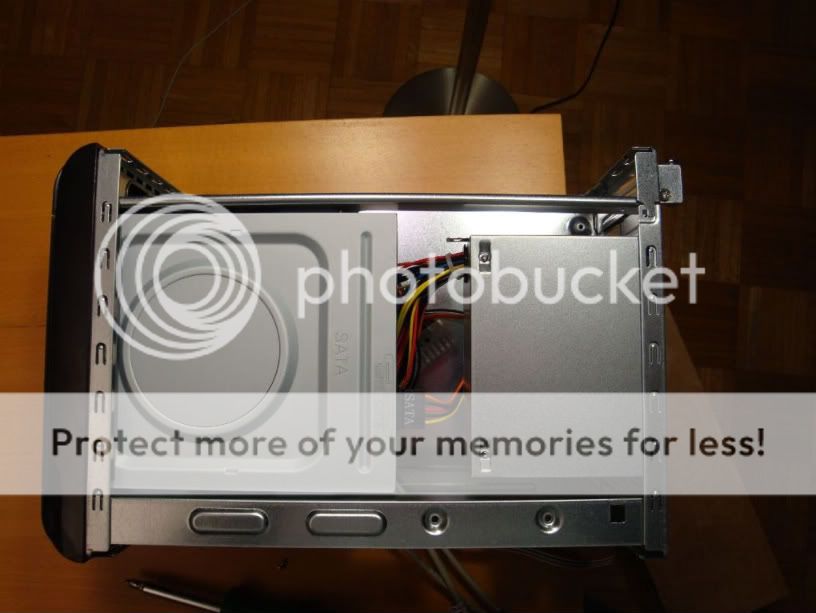
An extra 1.5 inches / 4 cm for cables/extended drive. That should work fine.

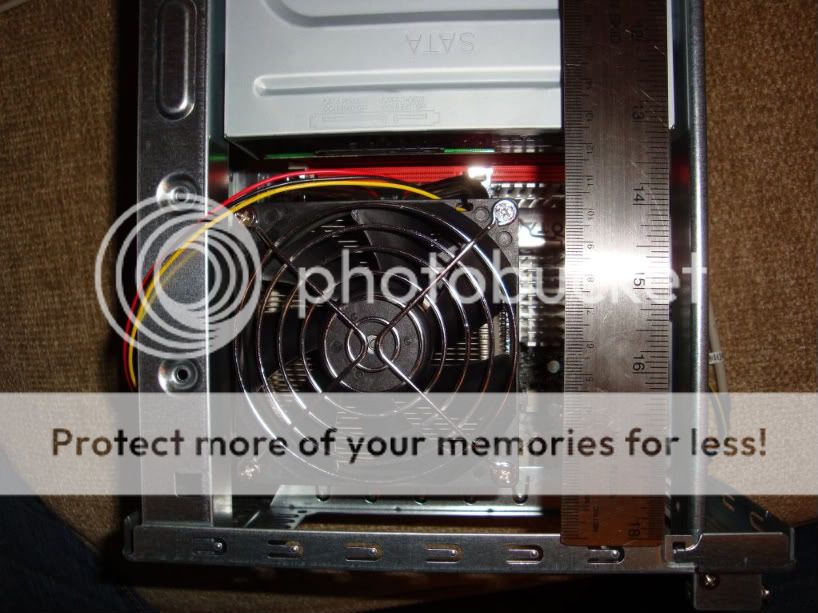
So, off to find my ideal aftermarket heatsink. After some research & scale modeling, I designed a cardboard prototype to find out how
much clearance I had for the HS & fan.
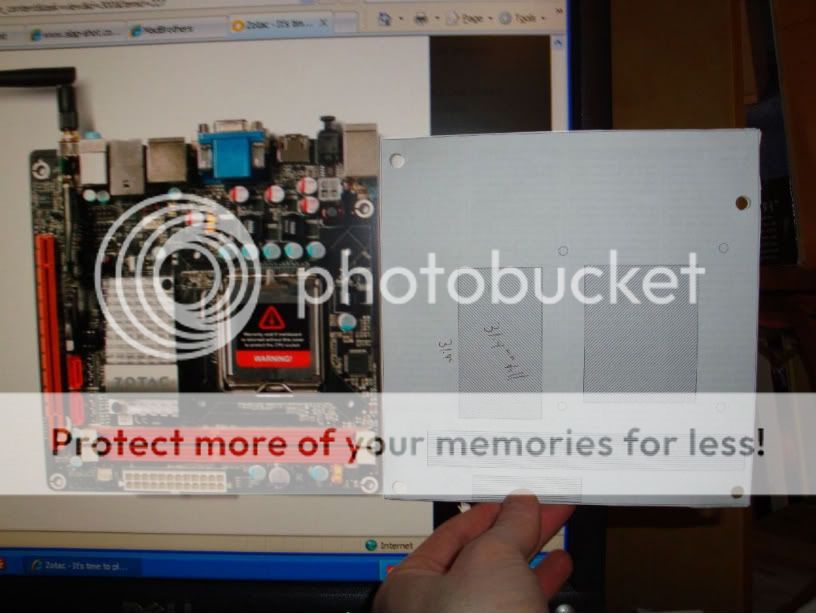
I mounted the printout to cardboard and put it into the case so that I could easily measure how much room I actually had to work with.

I also measured vertical clearance between the top of the mock mobo & the bottom of the optical drive & the top of the case.

After a great deal of research, I settle don an oldie but goodie, the Thermalright XP-90. It fit all of the dimensions perfectly.
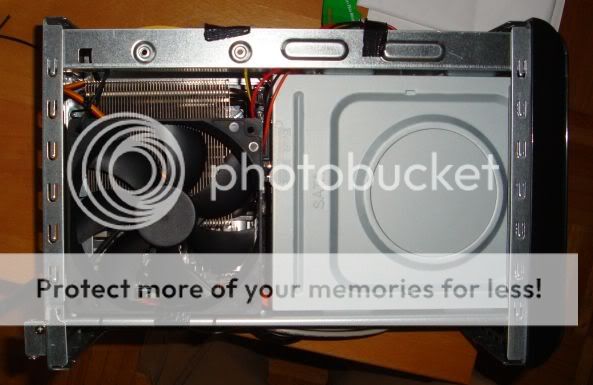
Before installing
the processor & Thermalright XP-90, let's make sure everything fits. As one can see, there's plenty of clearance all around.
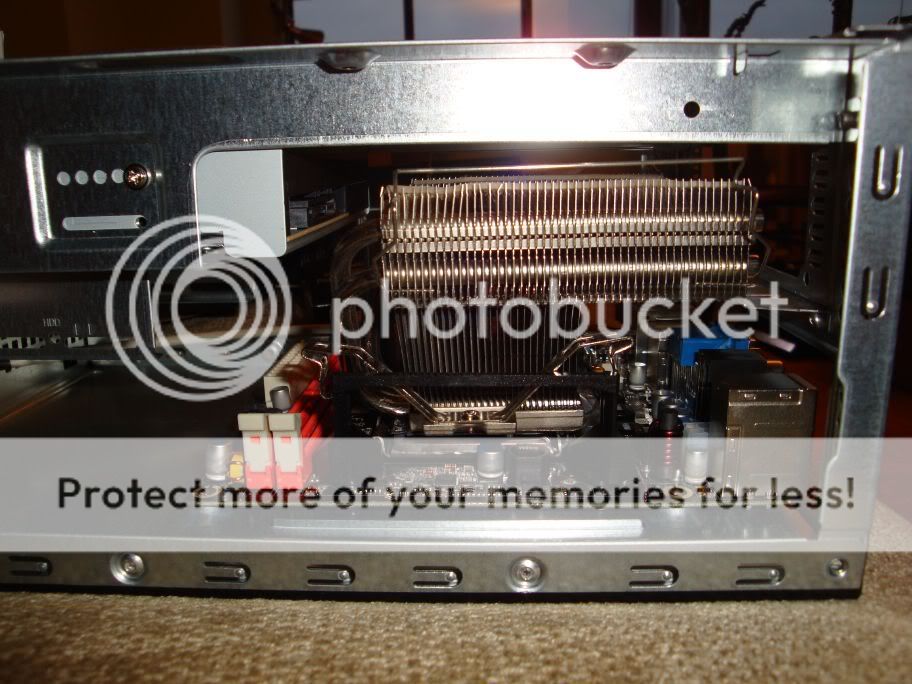

There's even space for a 120 mm fan on top!!! SuhWEET!
Unfortunately, at this point, I found that there was one major flaw in my plan. The baseplate of the XP-90 extended so far from the
processor, that the capacitors just behind the mounting plate interfered with the heatsink sitting down properly. I decided at
this point that I had nothing to lose by dremeling or hacking the baseplate of the heatsink in hopes of getting rid of juuust
enough for it to clear the caps. I found the dremel to be slow going and difficult to control, so I resorted to using a mini-hacksaw,
a gentle touch, some precision sawing, and half of a straw inserted into the heat tube holes to protect them from the saw.
The result:


A perfect fit!


After a bit of heatsink lapping, it all went together very nicely.


Here I have not so aesthetically taped up the wires running from the pico.
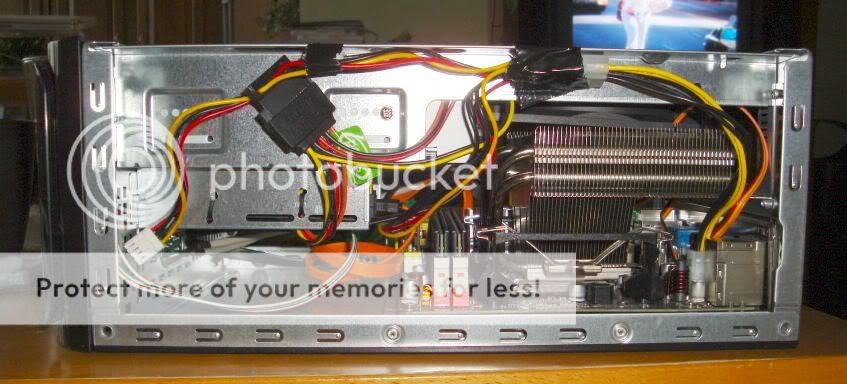
The tape here is the major component holding the fan in place. The black-tie looking things are actually something similar to
stretch magic...a product called Pony Bead Lacing. Instead of being solid, it is a hollow rubber-type material. 60 ft (20 m) was
about $4. I used this lacing to keep the fan separated from the case's rail, to tie the other end of the fan up to the opposing rail,
and to mount the hard drive. Being that I will be standing the case on end, the fan will mostly balance itself vertically, so I
didn't need to do anything more intricate.

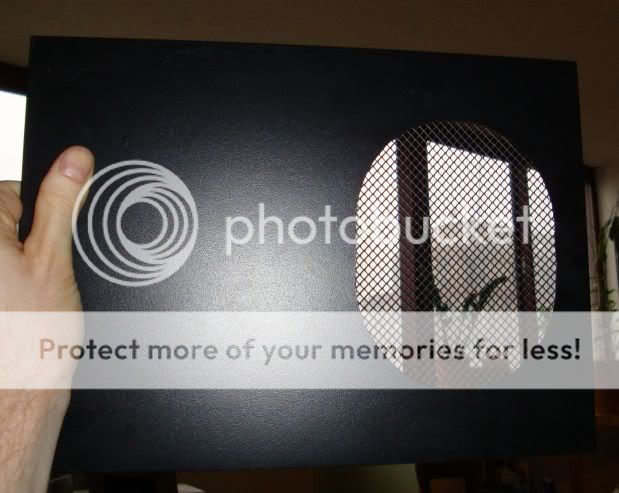
So, I obviously had to create a new hole in the top of the case for the 120mm fan (Scythe PWM), but I somehow got turned around
and started cutting the hole on the wrong side (right/left) of the case. The plan has always been to mount the fan offset from the
heatsink so that it would provide more airflow over the integrated GPU (the hottest component of the case). The hole was originally
going to be a regular circle over the fan, but after the goofup, I just stretched the circle into an oval to fix the error. It has
come out looking just fine. I pilfered some plastic netting from work and simply taped it against the inside of the case.
Finally, I decided that I couldn't live with the stock red & green HD activity & power LEDs, so $5 later, I installed a blue power
LED & a white HD activity LED. I love the results (the picture doesn't do it justice).

And so, here is my final (albeit messy) workspace.

Reviews:
The Apex case is very pleasing to the eye. As opposed to some reviews that I've read, the case is pretty sturdy and was a pleasure
to work with. I found it to be rather spacious. The front power button is somewhat flimsy and I can see it easily being broken at some
point if care is not taken when pressing it, but the delicate piece seems to be one that can be easily replaced with some thought.
Mobo:
The motherboard is well constructed, but comes with what must be the flimsiest backplate I've ever seen in my life. I would like to
replace the IGP heatsink at some point for better temps, but it is not necessary at the moment. It's currently idling at
67 degrees C and stabilizing in the low 80's with full load from FurMark. If I don't decide to change the HS, then I may put a
spare fan in aiming directly at the HS, but again, it's not something I'm currently planning on.
**Update on the IGP temps. I added some cardboard around 2 edges of the fan to direct all of the non-focused air back towards
the HS. The results are better than I could have expected. The temps dropped back below 60 degrees C. I was even able
to lower the fan speed (down to 860 rpm now) while still keeping temps under 60.**
Aftermarket Heastink & Fan:
Honestly, if I hadn't purchased the Thermalright XP-90 before putting the PC together, I likely wouldn't have bothered with it.
The stock Intel HS & Fan was working plenty fine and plenty quietly. As stated, I had already bought the HS, so I decided not to
waste it. The fan was bought after I managed to fit the HS.
Idle wattage:
Without Speedstep - 46
With Speedstep - 37
Wattage at Load:
85 (running Prime 95 + Furmark)
Comments & Questions welcome.
Zotac 9300-d-e (GeForce 9300 ITX Wifi)
Intel E8400
Apex MI-008
Hitachi 320 GB 7200 RPM 2.5" drive
DVD burner
PicoPSU 120 + brick
Thermalright XP-90 (modded)
Scythe 120mm PWM Fan
Backstory:
I dabbled in silence on my previous (first) computer build; an old AMD XP 2200+ built 5+ years ago. After having this hulking beast
taking up so much space under my desk, and seemingly getting louder and louder over the years, I decided that I wanted to go as
small & as silent as possible.
I don't do a lot of gaming and only rarely dabble in video editing, so this PC will be my everyday everything PC. Some
Illustrator, some video editing, online flash games, etc. With any luck, this PC will last me at least another 3-4 years.
After its useful life, it'll be small enough to port to any number of applications.
After some research, I settled on the components above.
Here is the photo story.
The Apex MI-008 is a beautiful case...shiny bezel, black finish, and plenty of room inside once the stock power supply is removed.
Beer scale!
Reference photos for those interested in possibly fitting a blu-ray into this case using stock PS..
An extra 1.5 inches / 4 cm for cables/extended drive. That should work fine.
So, off to find my ideal aftermarket heatsink. After some research & scale modeling, I designed a cardboard prototype to find out how
much clearance I had for the HS & fan.
I mounted the printout to cardboard and put it into the case so that I could easily measure how much room I actually had to work with.
I also measured vertical clearance between the top of the mock mobo & the bottom of the optical drive & the top of the case.
After a great deal of research, I settle don an oldie but goodie, the Thermalright XP-90. It fit all of the dimensions perfectly.
Before installing
the processor & Thermalright XP-90, let's make sure everything fits. As one can see, there's plenty of clearance all around.
There's even space for a 120 mm fan on top!!! SuhWEET!
Unfortunately, at this point, I found that there was one major flaw in my plan. The baseplate of the XP-90 extended so far from the
processor, that the capacitors just behind the mounting plate interfered with the heatsink sitting down properly. I decided at
this point that I had nothing to lose by dremeling or hacking the baseplate of the heatsink in hopes of getting rid of juuust
enough for it to clear the caps. I found the dremel to be slow going and difficult to control, so I resorted to using a mini-hacksaw,
a gentle touch, some precision sawing, and half of a straw inserted into the heat tube holes to protect them from the saw.
The result:
A perfect fit!
After a bit of heatsink lapping, it all went together very nicely.
Here I have not so aesthetically taped up the wires running from the pico.
The tape here is the major component holding the fan in place. The black-tie looking things are actually something similar to
stretch magic...a product called Pony Bead Lacing. Instead of being solid, it is a hollow rubber-type material. 60 ft (20 m) was
about $4. I used this lacing to keep the fan separated from the case's rail, to tie the other end of the fan up to the opposing rail,
and to mount the hard drive. Being that I will be standing the case on end, the fan will mostly balance itself vertically, so I
didn't need to do anything more intricate.
So, I obviously had to create a new hole in the top of the case for the 120mm fan (Scythe PWM), but I somehow got turned around
and started cutting the hole on the wrong side (right/left) of the case. The plan has always been to mount the fan offset from the
heatsink so that it would provide more airflow over the integrated GPU (the hottest component of the case). The hole was originally
going to be a regular circle over the fan, but after the goofup, I just stretched the circle into an oval to fix the error. It has
come out looking just fine. I pilfered some plastic netting from work and simply taped it against the inside of the case.
Finally, I decided that I couldn't live with the stock red & green HD activity & power LEDs, so $5 later, I installed a blue power
LED & a white HD activity LED. I love the results (the picture doesn't do it justice).
And so, here is my final (albeit messy) workspace.
Reviews:
The Apex case is very pleasing to the eye. As opposed to some reviews that I've read, the case is pretty sturdy and was a pleasure
to work with. I found it to be rather spacious. The front power button is somewhat flimsy and I can see it easily being broken at some
point if care is not taken when pressing it, but the delicate piece seems to be one that can be easily replaced with some thought.
Mobo:
The motherboard is well constructed, but comes with what must be the flimsiest backplate I've ever seen in my life. I would like to
replace the IGP heatsink at some point for better temps, but it is not necessary at the moment. It's currently idling at
67 degrees C and stabilizing in the low 80's with full load from FurMark. If I don't decide to change the HS, then I may put a
spare fan in aiming directly at the HS, but again, it's not something I'm currently planning on.
**Update on the IGP temps. I added some cardboard around 2 edges of the fan to direct all of the non-focused air back towards
the HS. The results are better than I could have expected. The temps dropped back below 60 degrees C. I was even able
to lower the fan speed (down to 860 rpm now) while still keeping temps under 60.**
Aftermarket Heastink & Fan:
Honestly, if I hadn't purchased the Thermalright XP-90 before putting the PC together, I likely wouldn't have bothered with it.
The stock Intel HS & Fan was working plenty fine and plenty quietly. As stated, I had already bought the HS, so I decided not to
waste it. The fan was bought after I managed to fit the HS.
Idle wattage:
Without Speedstep - 46
With Speedstep - 37
Wattage at Load:
85 (running Prime 95 + Furmark)
Comments & Questions welcome.