array of custom mini itx cases
Posted: Tue Jul 14, 2009 6:15 pm
Having finished with my main computer (or have I?) I needed something to keep my hands busy. Right, like I haven`t been busy enough lately.. So, after my masochistic instincts took over reason, I thought it would be nice to build a stylish nettop with zero moving parts.
This build is based around the Intel D945GSEJT low profile motherboard. Not only is it only 2cm high but it also has a built in dc/dc converter which is going to make my job a whole lot easier. I also got a laptop optical drive and a pair of usb headers, something very useful but often missing from custom builds. I still haven`t decided on storage, it`s going to be an ssd nevertheless.
So far I`ve made a few custom parts out of solid polystyrene sheets with fairly good success, so it was an obvious choice. The design is fairly simple but it took a lot of planning to get the dimensions right: in a mini-itx build every milimiter counts.
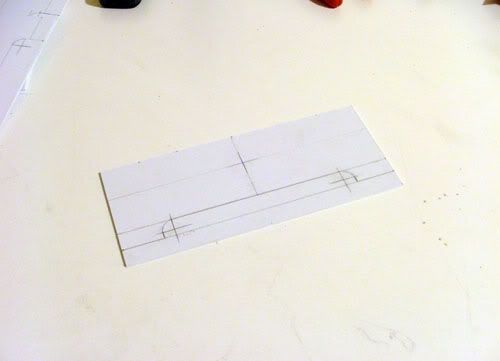
Here`s a frontal section which should give a pretty good idea of the internal layout:

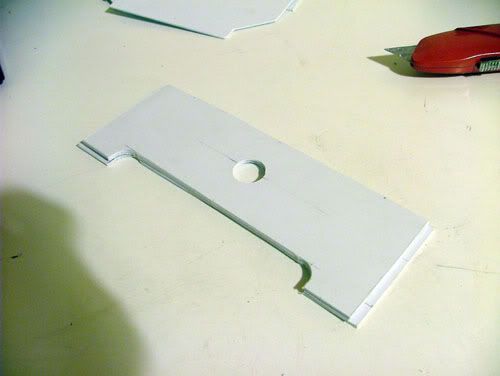
The first step was cutting the shapes out of the plastic sheets:
I used my drill for the round bits..
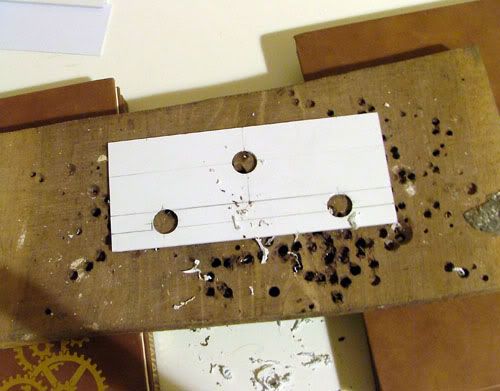
and a stanley knife for the rest. Each side consists of three 2mm layers, 6mm in total. Needed to achieve a decent structural integrity.
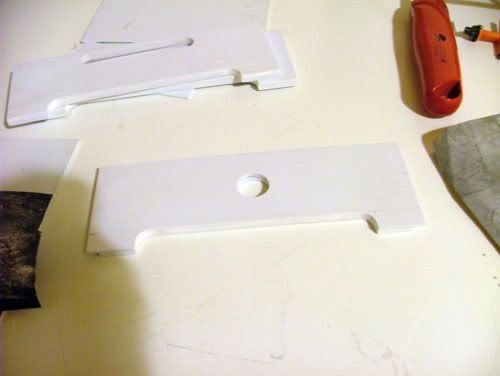
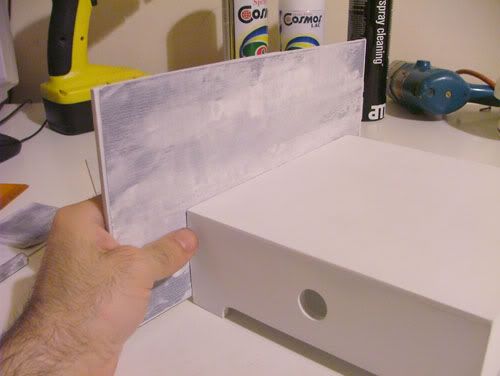
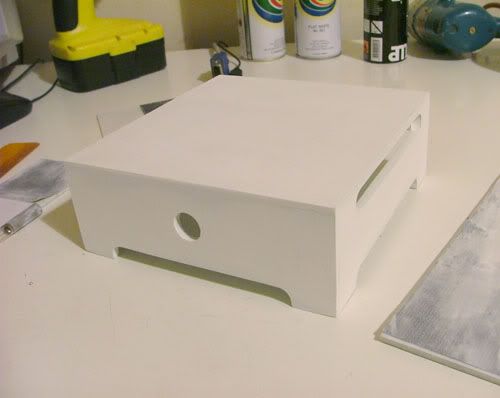
After a few filler/sanding cycles I got a satisfactoy finish:
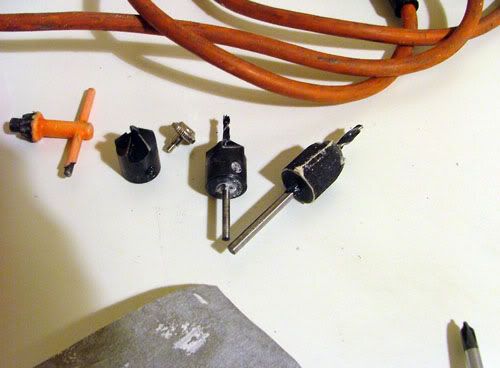
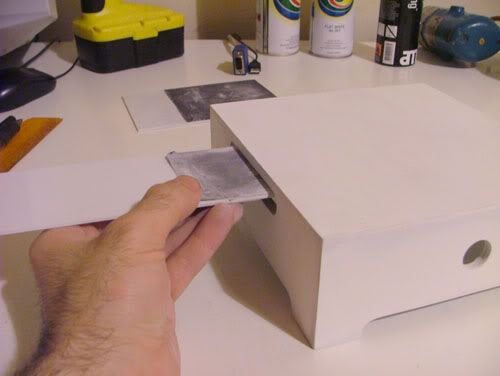
Those are the drill bit used to do the rounded corners. One of them has sandpaper attached on it to clean up the holes:
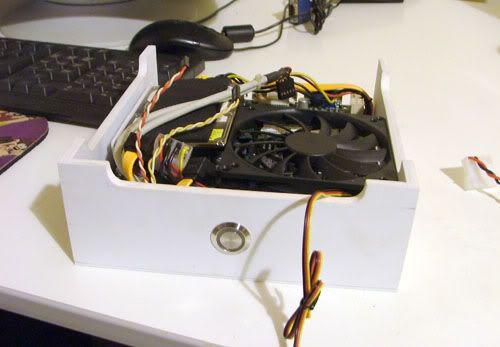
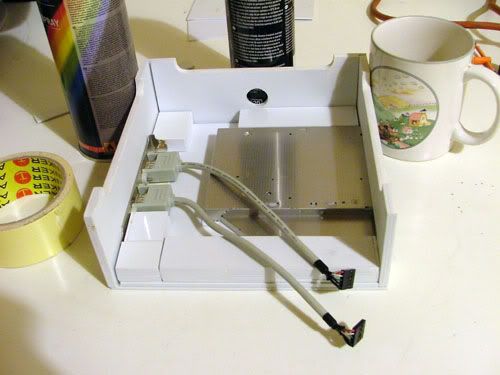
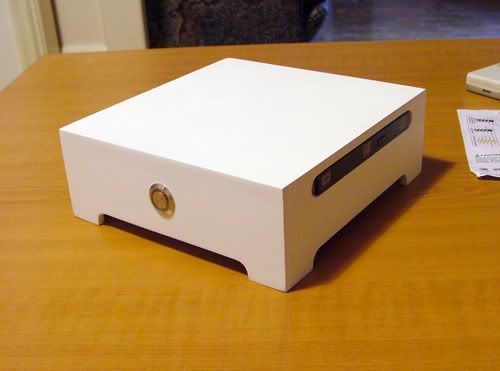
A test fit showing the usb headers, optical drives and some of the bits used to hold them in place.
Usb header closeup:
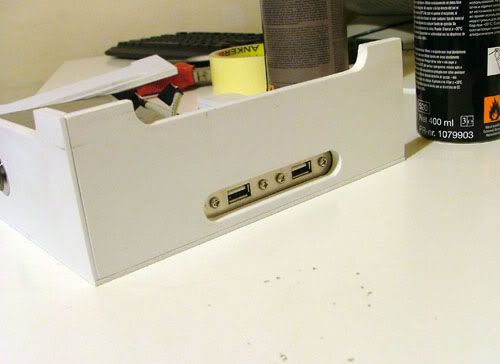
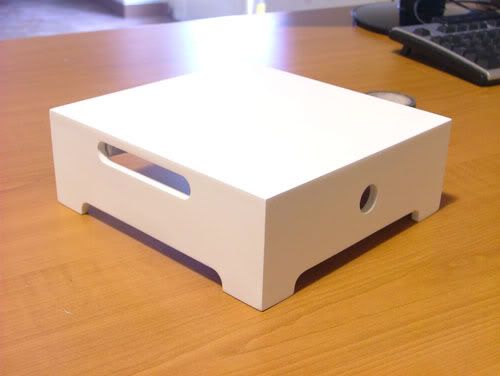
and shot of what will be the exterior:
update 16/7/09: the sleepless phantom of the opera.. I mean of silent computing
I have finally glued the pieces together so the case has reached it`s final form. A good time for a more throughout test fit.
The slides please....
testing the wiring of the power button:
optical drive, usb headers and most cables assembled:
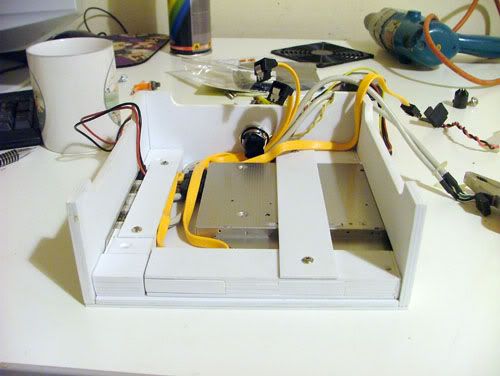
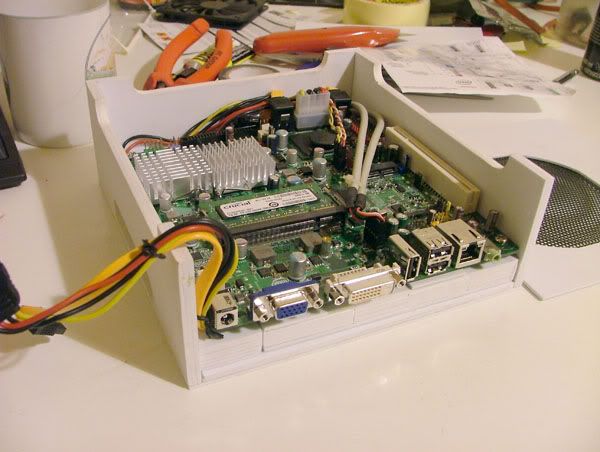
motherboard in place
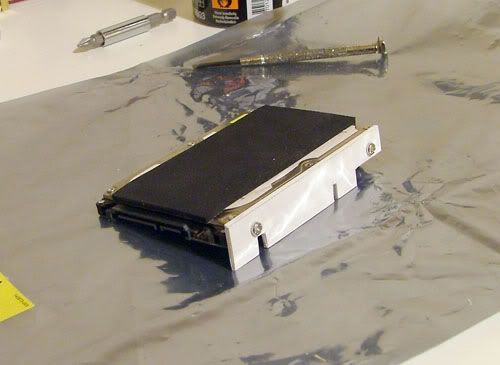
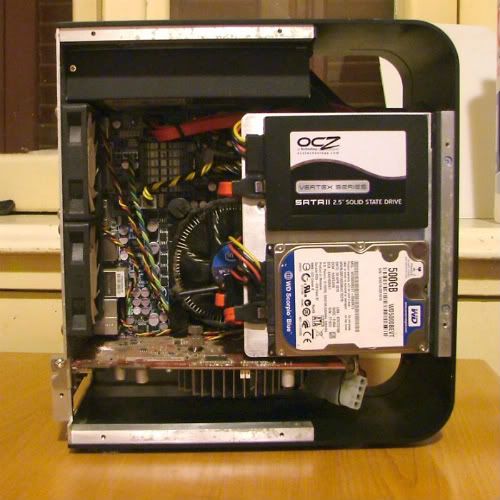
guess how I`m going to mount the hdd..
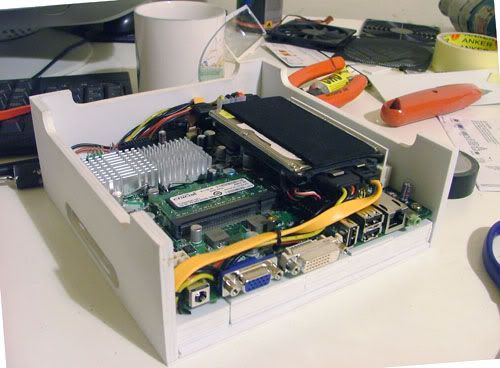
I had to find a use for that pci slot..
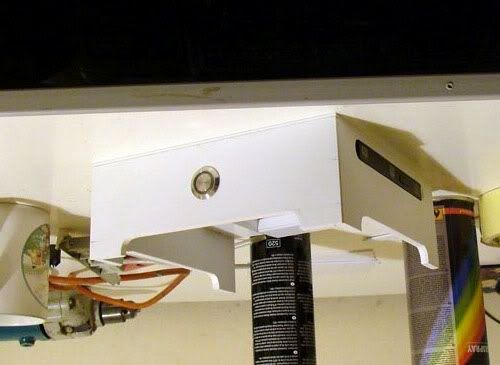
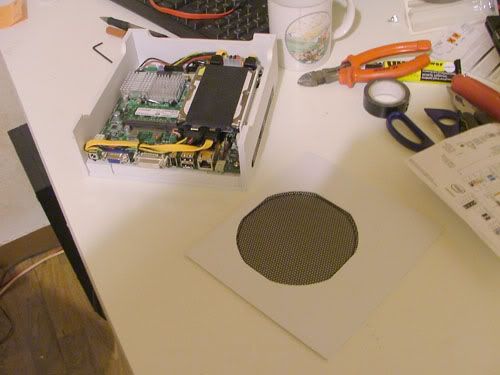
The bottom of the case with the intake vent. Still needs some work though.
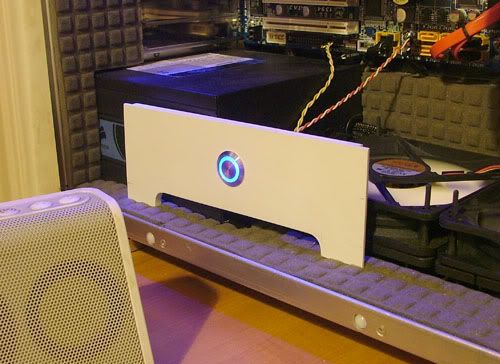
1st boot!
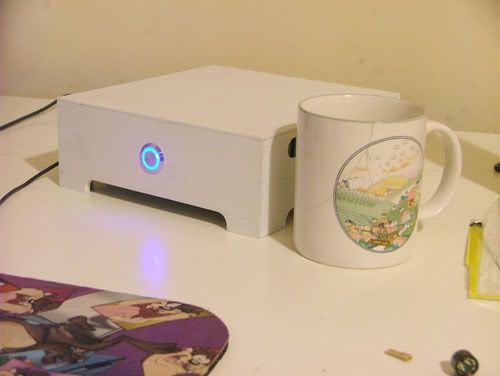
and a "mug" shot
update 20/7/09: still lapping
just a few pictures of the methods I`m using..
I`m using sandpaper mounted on a flat surface to do the sides. This will help me keep the edges crisp.
To do the slits is use a smaller version of the above along with a pen cap dressed in sanding paper:

Progress so far. There`s still some way to go.
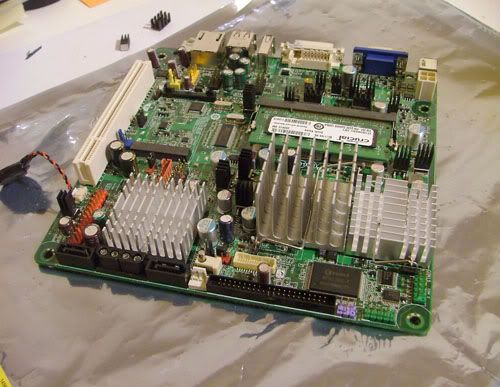
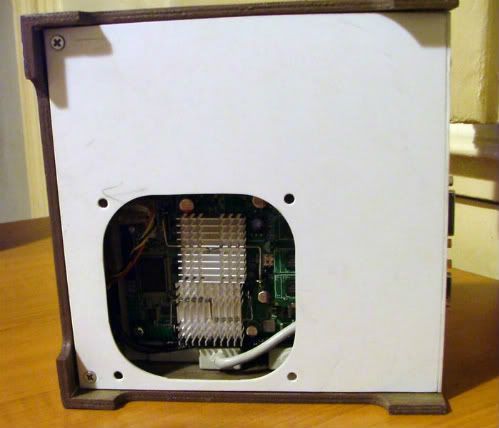
Taking a brake from lapping, I tried to improve the cooling of the motherboard. The northbridge/igp has the highest TDP at 5 watts so it gets a bigger heatsink. The stock one was moved to the southbridge (3 watts TDP). I also added some small heatsinks on the power transistors.
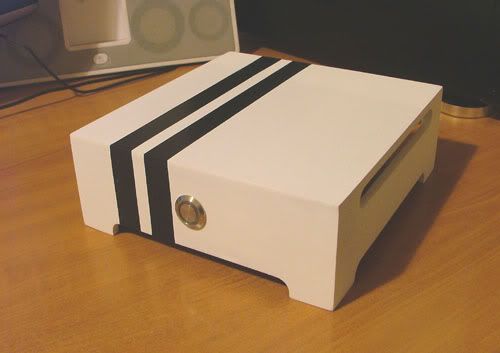
update 25/7/09: finally done!
After a very frustrating week I have finally finished. Eventually I went for matte white to match the custom front of my main computer. Not much esle to say as you`ve already seen the interior. I`ve only changed the orientation of the hdd to make cable management a little easier. The bottom cover also got revised. I`m planning to switch to an ssd eventually, preferably in the mini pci-e format.
So, here`s the finished product..
just before the final assembly:
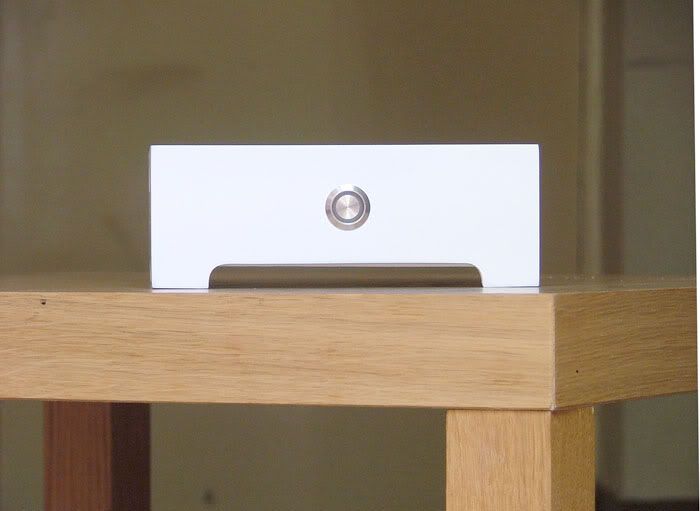
and after:
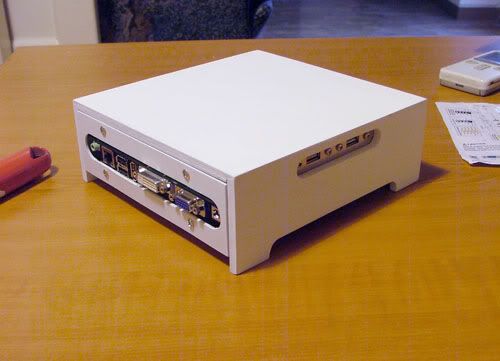
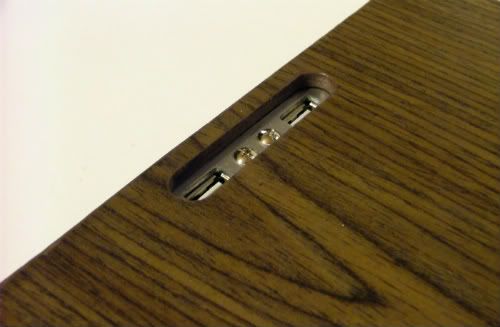
i/o ports:
the revised bottom intake:

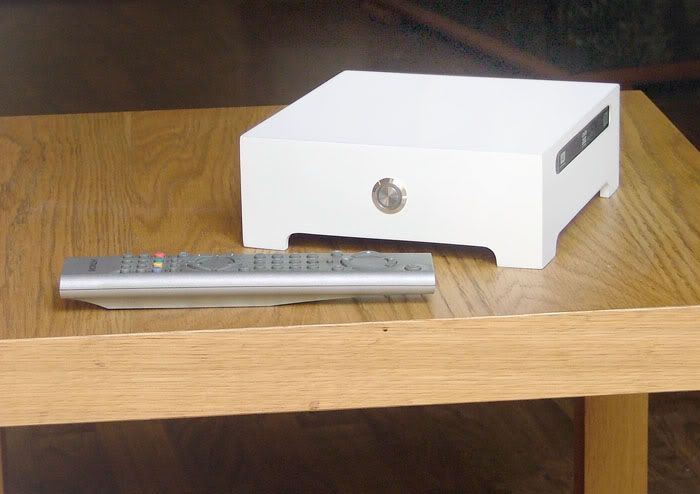
and a couple of "lifestyle" shots:
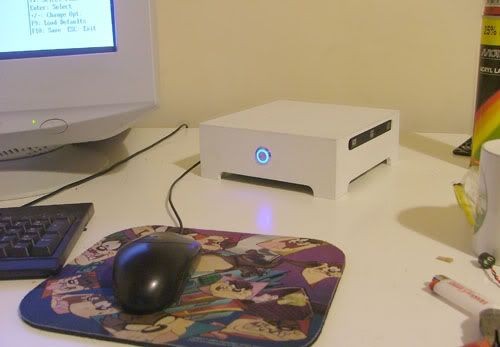
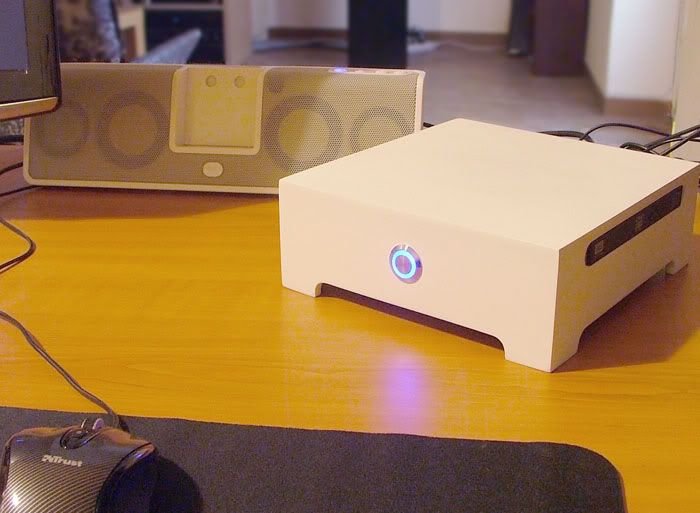
on my desk, installing windows:
Thanks for watching!
update 8/5/10: wooden version
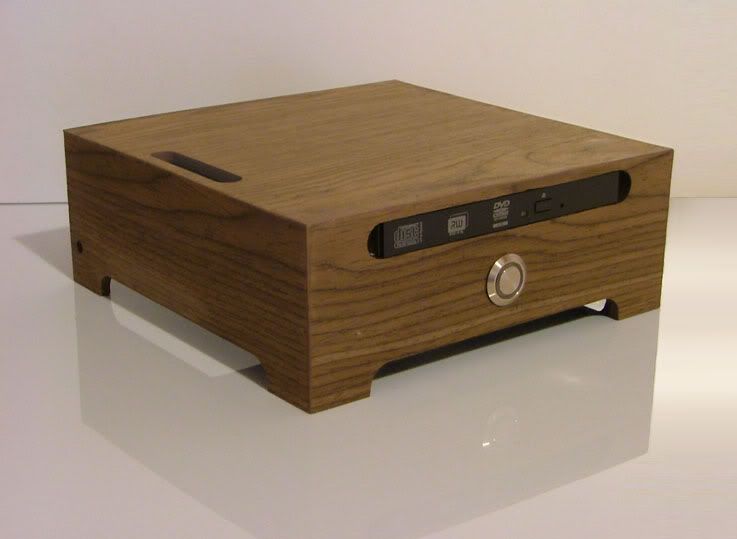
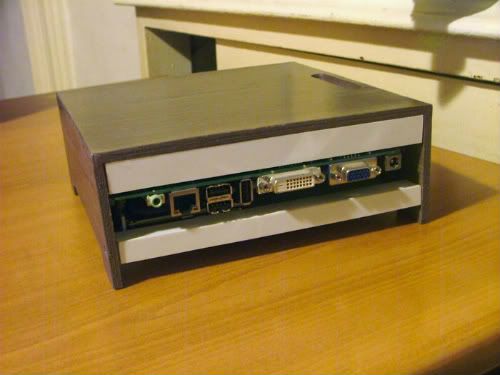
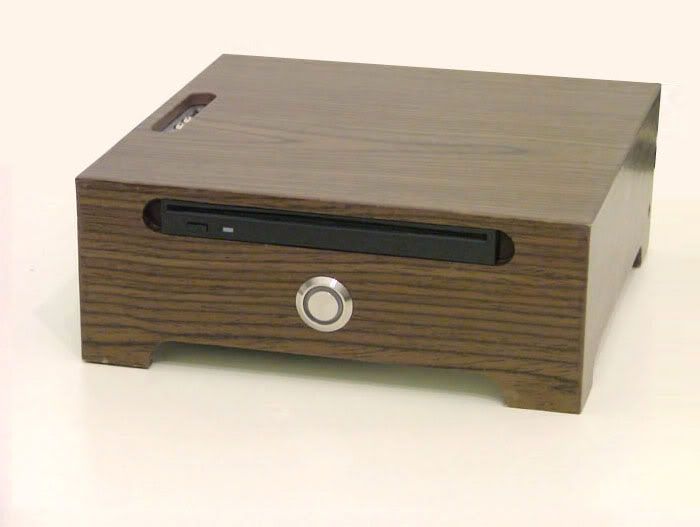
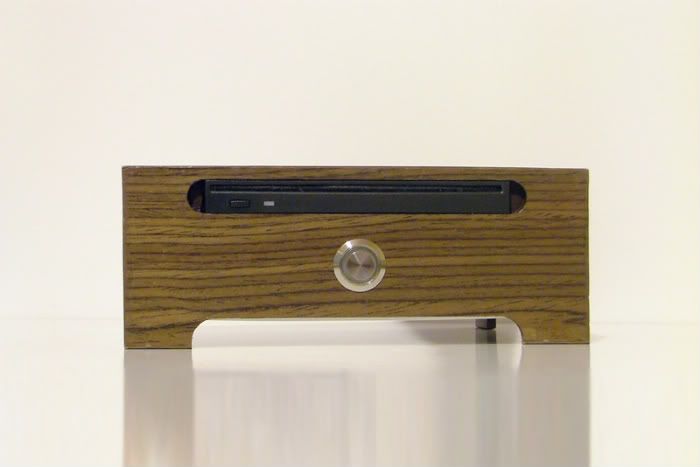
The very first time I thought about building my custom mini itx case, I wanted to do it in walnut. Unfortunately, I`m not very adept at working with wood so I ended up making a prototype out of plastic. I planned to have it made for me in wood, at a later time. Well, this time has come, and yesterday I received the finished enclosure. I`m planning to write down a detailed log, for now here are some first pics:
update 18/10/11 : aluminium, versions 1 & 2
aluminium v1
With low profile sandy bridge motherboards now available I was tempted to ressurect my netbook project only this time it would be more capable, featuring a proper desktop cpu. Since the beggining I had thought about building a the case out of metal, most likely aluminium. Now I always put it off, because it would be costly and extremely time consuming, requiring a greater amount of accuracy in the design. Plastic made a great starting material, being almost disposable and easy to work with. An error in design was almost inconsequential while a mistake when building out of metal would have a significant cost in both time and money.
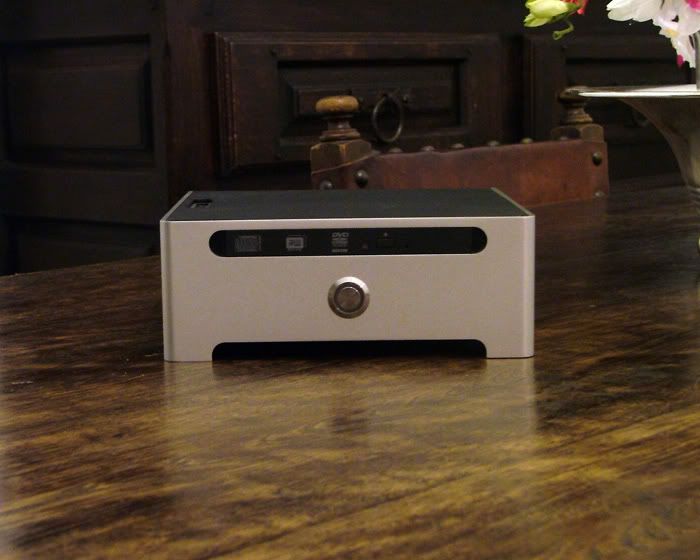
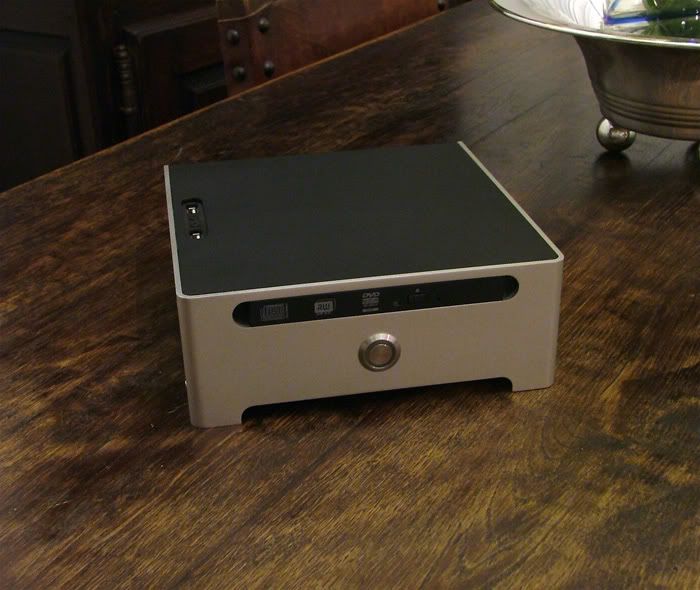
It still remained at the back of my head as an ultimate goal. Besides, after two versions (plastic and wooden) most of the bugs were ironed out so the design phase shouldn`t be so hard. Eventually, I managed to justify the cost of the endeavor and a metalic version started shortly after the wooden one. Most of the parts were built for me in aluminium, the rest were hand built in plastic. If we ignore the plastics, the process was simple: the parts were modelled in 3d, exported to the right format and sent to the factory. External parts are anodized aluminium, plain brushed aluminium will do for the rest. It`s mostly a copy of the original design, adapted to the new material as I didn`t want to introduce new bugs (in spite of this, some bugs made it and I had to resort to hand built replacements). So far it has been tested with the Intel D945GSEJT and a slim 100x100x13mm fan but there`s enough room for the intel stock cooler plus a regular 25mm fan (stock fan removed).
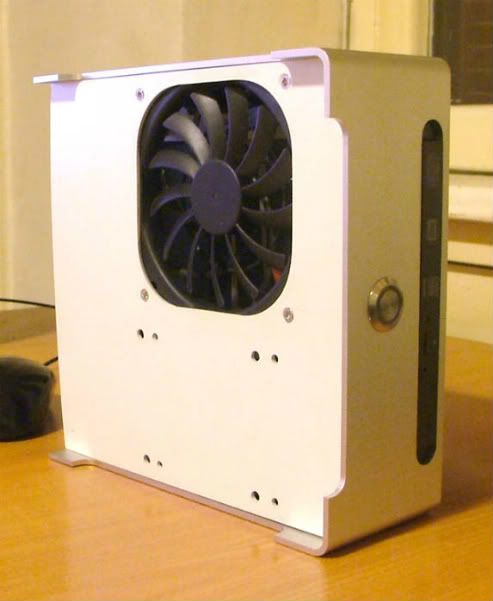
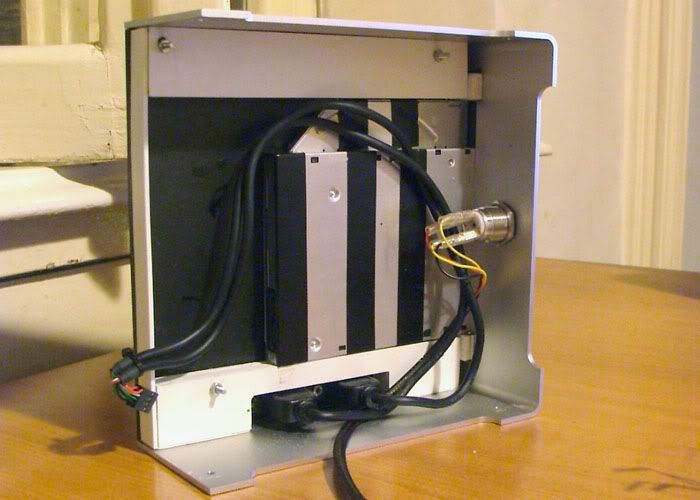
These pictures should help you get a better understanding of how it`s set up. The underside you see here was intended for a D945GSEJT build so I still need to change the fan location to match the typical mini itx SB board.
Wooden version juxtaposed to fill in the blanks:
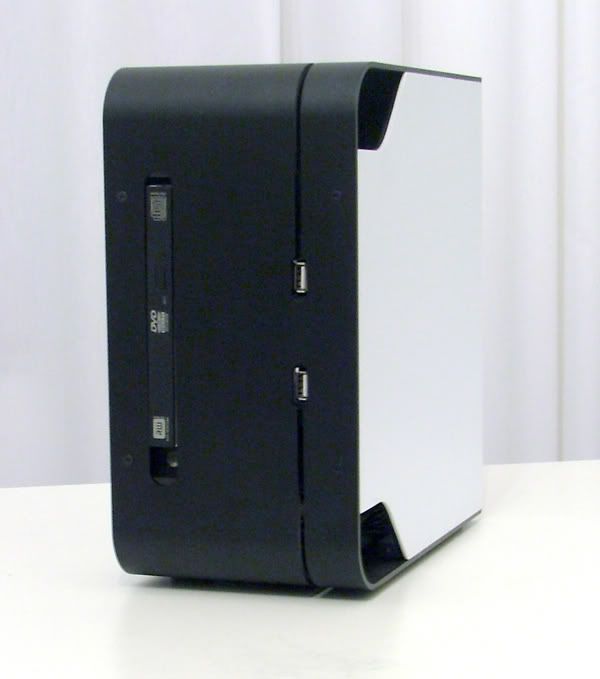
Aluminium v2
Here it took it up a notch, making room for a discreet dual slot gpu and a 1u power supply, along with a couple of 2.5 inch drives. The dimensions are 26x26x13cm, it was about as small as I could go and still get a servicable gaming pc. This is not necessarilly the sweet spot though, I would certainly consider using a more common sfx/tfx power supply and making more room for custom gpu ventilation. The form factor is somewhat influenced by the mini towers/desktops of some time ago. My goal was to make something with attractive proporsions which would also make efficient use of available space. One problem with the shoebox form factor is the large footprint. A Silverstone Sg07 on my desk would be problematic and after extensive use, I find the mini tower form factor less obtrusive.


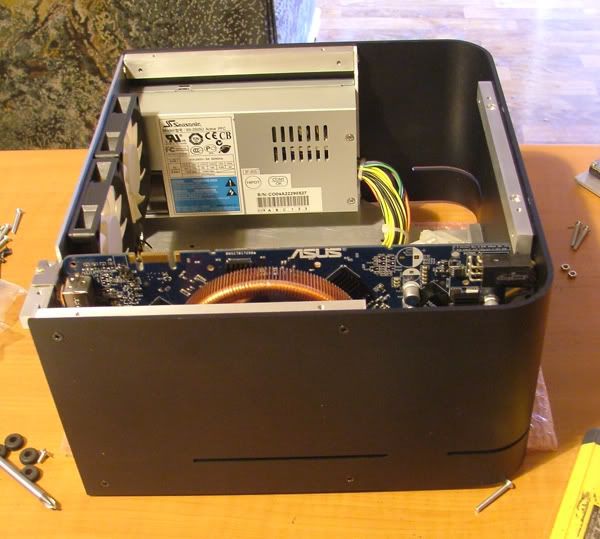
Currently configured with a socket 1156 dual core pentium and a hd4670 gpu. The power supply is a 250 watt flex atx Seasonic. While I could have fitted a more powerful video card, I didin`t really need to. With a more powerful card, a blower style cooler will most likely become necessary. I wouldn`t want the gpu cooler exhausting back into such a small case. The power supply could also become a limitation. It can provide around 210 watts @ 12v. A gtx 460 got me pretty close to this figure in games and exceeded it in furmark , so I settled for a 4670 I had around. As it is, it`s pretty quiet as I can get away with setting the case fans to 5 volts. Even the power supply fan is fairly quiet if a little buzzy, running more slowly than expected. There`s no denying though, that to get the most out of it, I`ll need a slightly more powerful power supply, and a 28mm gpu with a blower cooler.
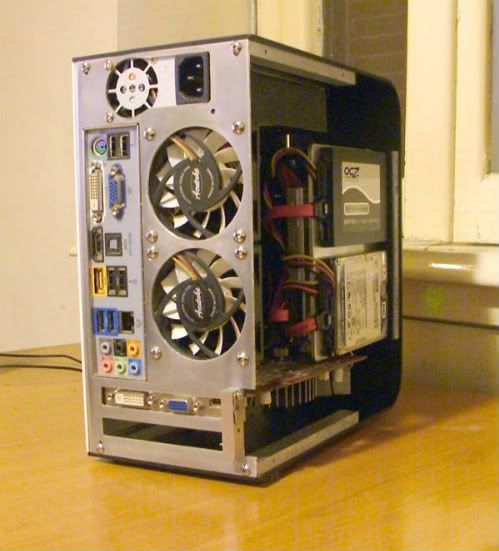
The case fans might seem like an odd choice. I was looking to minimize the width of the case providing just enough room to fit a full height video card. The largest fan that I could fit was 7cm wide. Fortunaly, it seems I have overcome the largest problem with using small size fans: ball bearings. This one claims to sport an FDB, in practice it is perfectly smooth at all speeds, a welcome break from the usuall buzzy small fan. They are loud-ish at maximum speed but at the same time, the noise character is very benign almost pleasing. Inside the case, things get worse as expected but noise levels drop very quickly when lowering voltage. In my environment they become inaudible at around 7-8 volts, which is more than enough in the current setup.
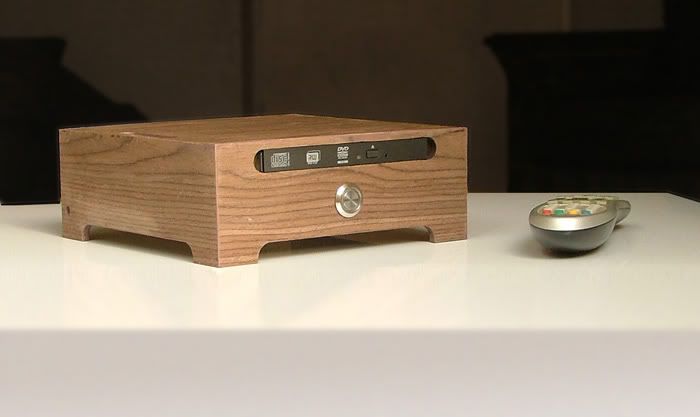
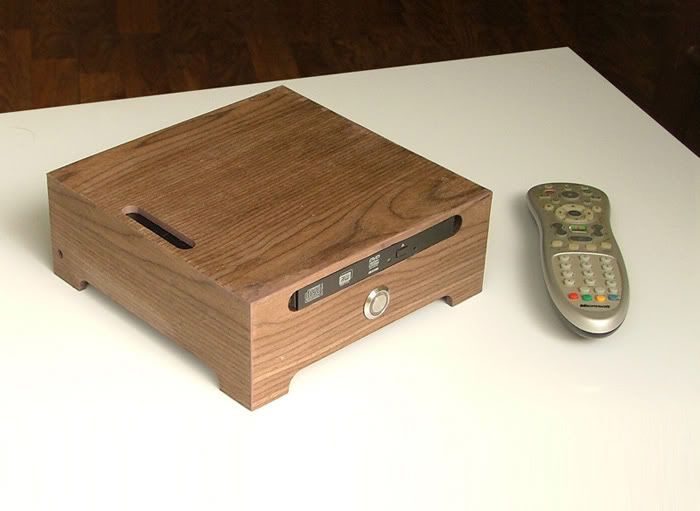
Finally, some more up to date shots of the wooden model:
This build is based around the Intel D945GSEJT low profile motherboard. Not only is it only 2cm high but it also has a built in dc/dc converter which is going to make my job a whole lot easier. I also got a laptop optical drive and a pair of usb headers, something very useful but often missing from custom builds. I still haven`t decided on storage, it`s going to be an ssd nevertheless.
So far I`ve made a few custom parts out of solid polystyrene sheets with fairly good success, so it was an obvious choice. The design is fairly simple but it took a lot of planning to get the dimensions right: in a mini-itx build every milimiter counts.
Here`s a frontal section which should give a pretty good idea of the internal layout:
The first step was cutting the shapes out of the plastic sheets:
I used my drill for the round bits..
and a stanley knife for the rest. Each side consists of three 2mm layers, 6mm in total. Needed to achieve a decent structural integrity.
After a few filler/sanding cycles I got a satisfactoy finish:
Those are the drill bit used to do the rounded corners. One of them has sandpaper attached on it to clean up the holes:
A test fit showing the usb headers, optical drives and some of the bits used to hold them in place.
Usb header closeup:
and shot of what will be the exterior:
update 16/7/09: the sleepless phantom of the opera.. I mean of silent computing
I have finally glued the pieces together so the case has reached it`s final form. A good time for a more throughout test fit.
The slides please....
testing the wiring of the power button:
optical drive, usb headers and most cables assembled:
motherboard in place
guess how I`m going to mount the hdd..
I had to find a use for that pci slot..
The bottom of the case with the intake vent. Still needs some work though.
1st boot!
and a "mug" shot
update 20/7/09: still lapping
just a few pictures of the methods I`m using..
I`m using sandpaper mounted on a flat surface to do the sides. This will help me keep the edges crisp.
To do the slits is use a smaller version of the above along with a pen cap dressed in sanding paper:
Progress so far. There`s still some way to go.
Taking a brake from lapping, I tried to improve the cooling of the motherboard. The northbridge/igp has the highest TDP at 5 watts so it gets a bigger heatsink. The stock one was moved to the southbridge (3 watts TDP). I also added some small heatsinks on the power transistors.
update 25/7/09: finally done!
After a very frustrating week I have finally finished. Eventually I went for matte white to match the custom front of my main computer. Not much esle to say as you`ve already seen the interior. I`ve only changed the orientation of the hdd to make cable management a little easier. The bottom cover also got revised. I`m planning to switch to an ssd eventually, preferably in the mini pci-e format.
So, here`s the finished product..
just before the final assembly:
and after:
i/o ports:
the revised bottom intake:
and a couple of "lifestyle" shots:
on my desk, installing windows:
Thanks for watching!
update 8/5/10: wooden version
The very first time I thought about building my custom mini itx case, I wanted to do it in walnut. Unfortunately, I`m not very adept at working with wood so I ended up making a prototype out of plastic. I planned to have it made for me in wood, at a later time. Well, this time has come, and yesterday I received the finished enclosure. I`m planning to write down a detailed log, for now here are some first pics:
update 18/10/11 : aluminium, versions 1 & 2
aluminium v1
With low profile sandy bridge motherboards now available I was tempted to ressurect my netbook project only this time it would be more capable, featuring a proper desktop cpu. Since the beggining I had thought about building a the case out of metal, most likely aluminium. Now I always put it off, because it would be costly and extremely time consuming, requiring a greater amount of accuracy in the design. Plastic made a great starting material, being almost disposable and easy to work with. An error in design was almost inconsequential while a mistake when building out of metal would have a significant cost in both time and money.
It still remained at the back of my head as an ultimate goal. Besides, after two versions (plastic and wooden) most of the bugs were ironed out so the design phase shouldn`t be so hard. Eventually, I managed to justify the cost of the endeavor and a metalic version started shortly after the wooden one. Most of the parts were built for me in aluminium, the rest were hand built in plastic. If we ignore the plastics, the process was simple: the parts were modelled in 3d, exported to the right format and sent to the factory. External parts are anodized aluminium, plain brushed aluminium will do for the rest. It`s mostly a copy of the original design, adapted to the new material as I didn`t want to introduce new bugs (in spite of this, some bugs made it and I had to resort to hand built replacements). So far it has been tested with the Intel D945GSEJT and a slim 100x100x13mm fan but there`s enough room for the intel stock cooler plus a regular 25mm fan (stock fan removed).
These pictures should help you get a better understanding of how it`s set up. The underside you see here was intended for a D945GSEJT build so I still need to change the fan location to match the typical mini itx SB board.
Wooden version juxtaposed to fill in the blanks:
Aluminium v2
Here it took it up a notch, making room for a discreet dual slot gpu and a 1u power supply, along with a couple of 2.5 inch drives. The dimensions are 26x26x13cm, it was about as small as I could go and still get a servicable gaming pc. This is not necessarilly the sweet spot though, I would certainly consider using a more common sfx/tfx power supply and making more room for custom gpu ventilation. The form factor is somewhat influenced by the mini towers/desktops of some time ago. My goal was to make something with attractive proporsions which would also make efficient use of available space. One problem with the shoebox form factor is the large footprint. A Silverstone Sg07 on my desk would be problematic and after extensive use, I find the mini tower form factor less obtrusive.
Currently configured with a socket 1156 dual core pentium and a hd4670 gpu. The power supply is a 250 watt flex atx Seasonic. While I could have fitted a more powerful video card, I didin`t really need to. With a more powerful card, a blower style cooler will most likely become necessary. I wouldn`t want the gpu cooler exhausting back into such a small case. The power supply could also become a limitation. It can provide around 210 watts @ 12v. A gtx 460 got me pretty close to this figure in games and exceeded it in furmark , so I settled for a 4670 I had around. As it is, it`s pretty quiet as I can get away with setting the case fans to 5 volts. Even the power supply fan is fairly quiet if a little buzzy, running more slowly than expected. There`s no denying though, that to get the most out of it, I`ll need a slightly more powerful power supply, and a 28mm gpu with a blower cooler.
The case fans might seem like an odd choice. I was looking to minimize the width of the case providing just enough room to fit a full height video card. The largest fan that I could fit was 7cm wide. Fortunaly, it seems I have overcome the largest problem with using small size fans: ball bearings. This one claims to sport an FDB, in practice it is perfectly smooth at all speeds, a welcome break from the usuall buzzy small fan. They are loud-ish at maximum speed but at the same time, the noise character is very benign almost pleasing. Inside the case, things get worse as expected but noise levels drop very quickly when lowering voltage. In my environment they become inaudible at around 7-8 volts, which is more than enough in the current setup.
Finally, some more up to date shots of the wooden model: