SYSTEM ASSEMBLY
Assembling the system was a relatively straight forward procedure. Our biggest challenge was cable management as there simply wasn’t a lot of space to hide extra cabling. For full case assembly instructions and more pictures, please read our Silverstone Sugo SG07 review.
 Fully assembled. |
 The drive cage slides out from the side and can hold 1 x 3.5″ drive in the upper compartment and 2 x 2.5″ drives underneath. |
 Due to the position of the power supply, the various cables come out near the end of the video card. We stuffed most of the extra cabling in the empty hard drive bay and in the spaces between the PSU and the video card/motherboard. |
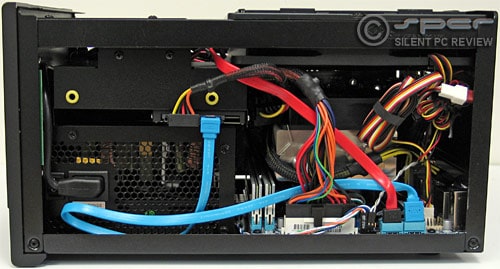 Cabling on the right side case is not too bad. Tying up the wires from the fan and controller keeps things pretty tidy. Due to the odd location of the SATA ports on the motherboard, an 11″ long slim SATA adapter cable is required for the optical drive. |
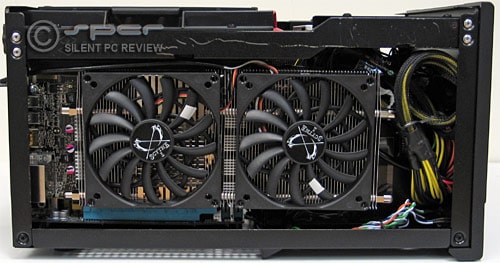 The Musashi fits in our case with enough space for a mess of cables tied down on the right side. |
 The vents at the side of the case feed fresh air to the GPU cooler. |
 There wasn’t a place for the Musashi’s fan controller, so we hung its knobs outside the case (the bracket had to be removed) to change the fan speed during testing. Once the desired speed is found, you can find an out of the way place to shove it inside. |
Discuss this article in the SPCR Forums.