
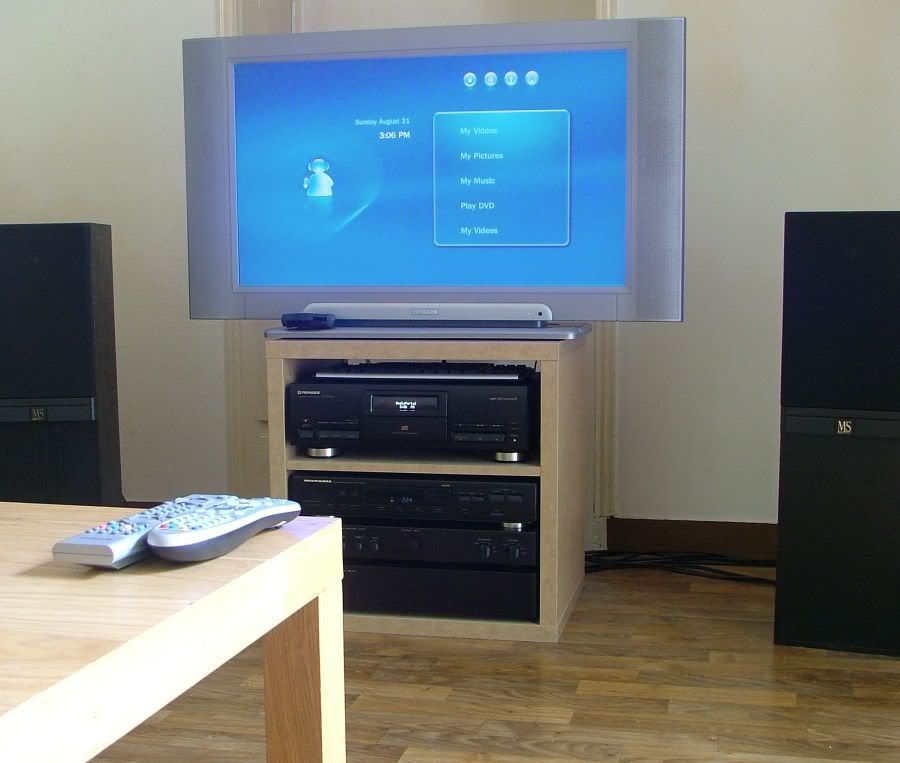
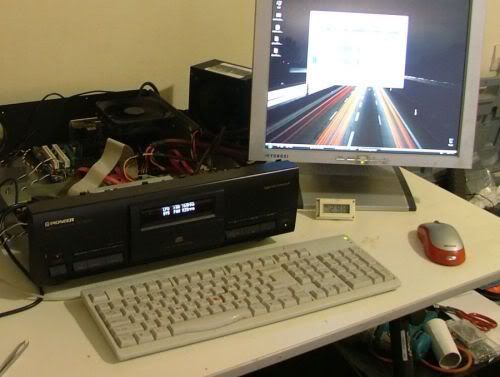
Finally I got to take some pictures of the pc in action. Though it`s been running for a couple of weeks I only got to install it in the living room 3 days ago. It`s been running media portal and aside from a few minor bugs, typical of open source software, it`s been a very positive experience. I love having all my music available for immediate playback (encoded using apple lossless format).
It`s also very quiet, inaudible actually. The sturdy case helps: the front bezel is made of thick aluminium with a second plastic layer inside, good at filtering hdd noise. What`s surprising is that after assembling the case both fan speed and temperatures dropped. Glad to see my cooling layout is actually working.
stock settings /asembled case:
1-2.1ghz @ 1-1.2v
.........M/B . CPU . HDD . . .FAN
Idle . : 32 . . 23 . . . 32 . . . 450RPM
While the motherboad temperature was unchanged both cpu and hdd dropped by 2 degrees while the cpu fan speed dropped to 450rpm (was 600).
So time for some pictures:
Psu in place and ready for assembly. The backplate now has an aluminium layer for shielding purposes:
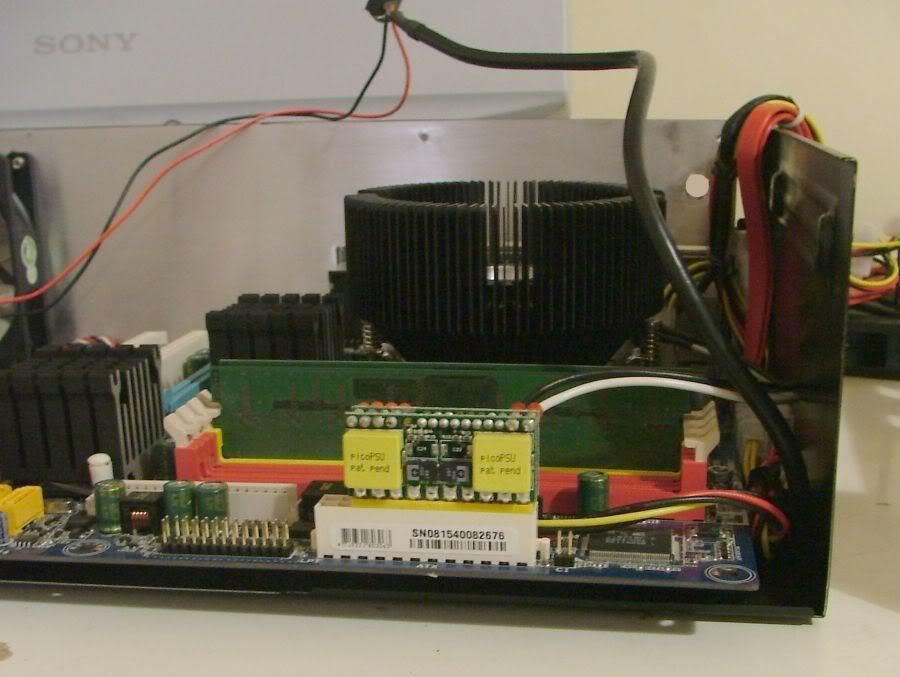
Close-up 1:
Close-up 2:
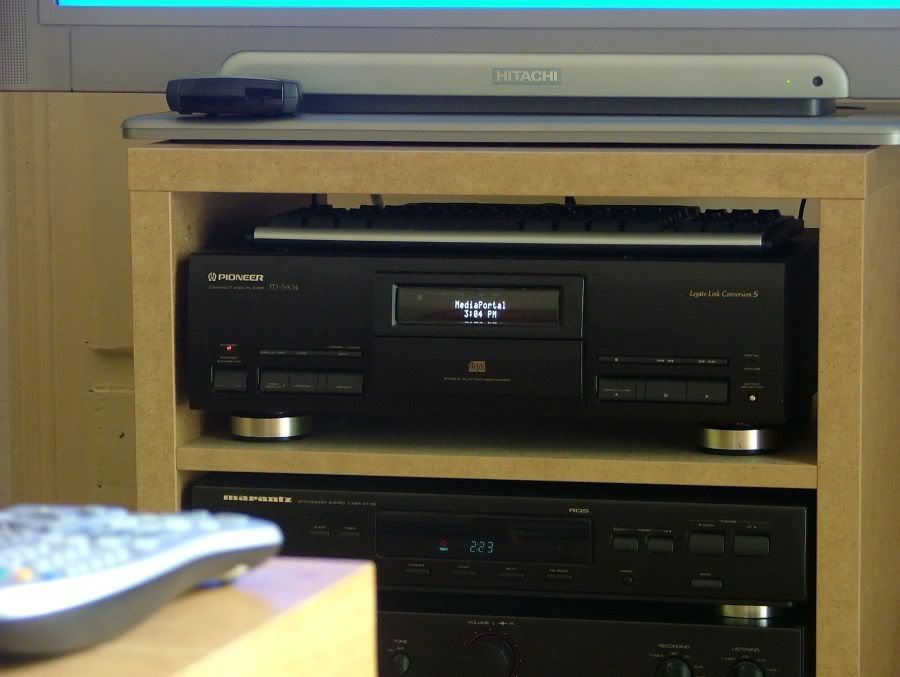
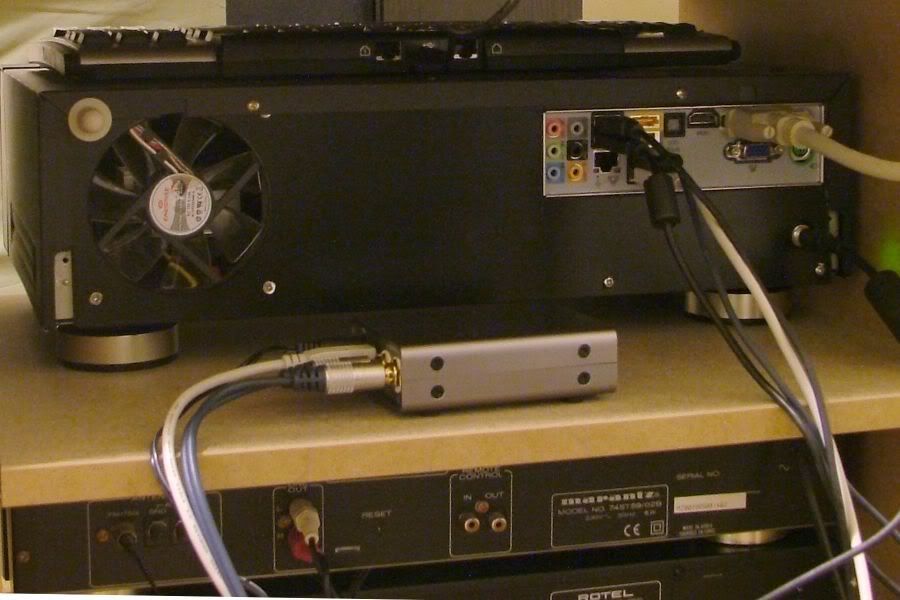
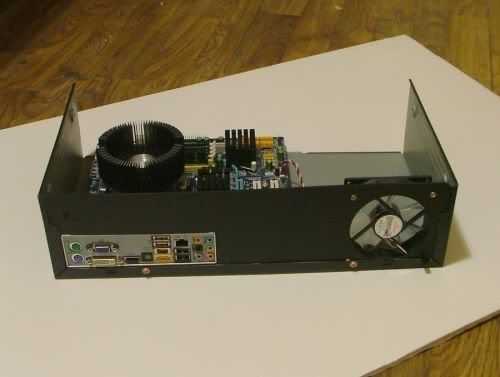
View from behind & external DAC:
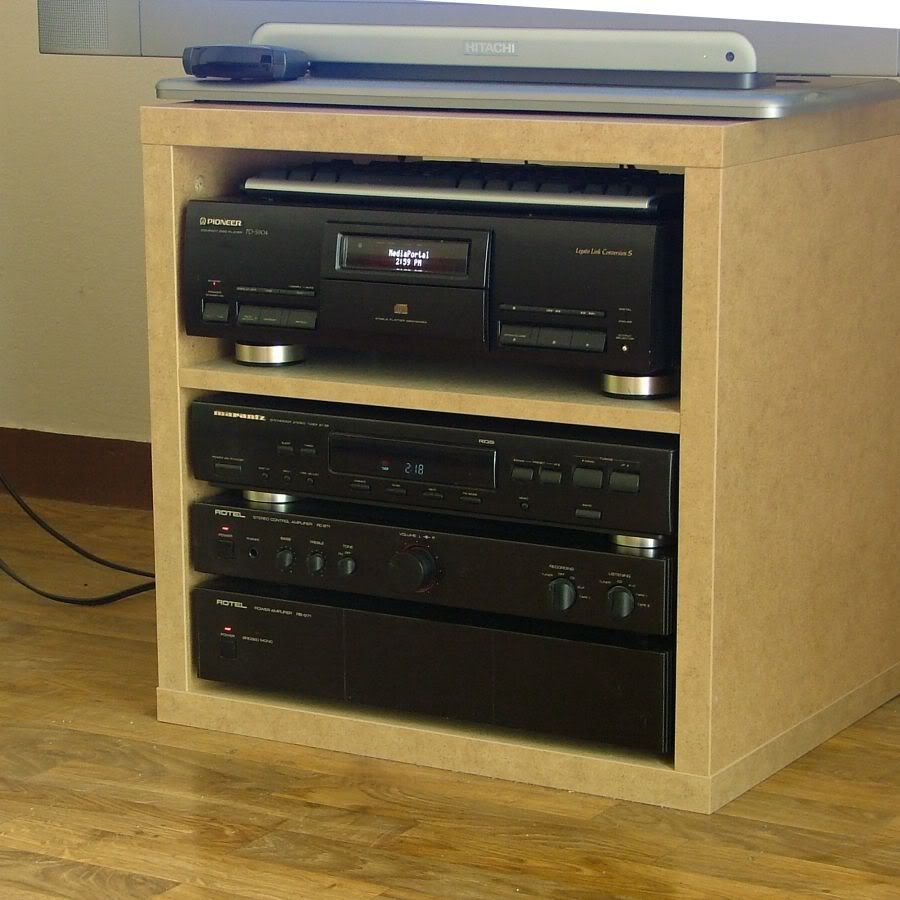
And the money shot:
update 11/8/08 cable managment & software setup
Still no pico psu but I wasted no time. It was a good time to deal with cable management which proved to be non trivial: the components are located in two different parts. After some planning I decided to route most cables under the motherboard. I seemed to be the only way I could achieve a somehow clean result.
Many of you will think it`s probably not a good idea. You`d be right: The parallel cable picked up interference that corrupted the display of my vfd:
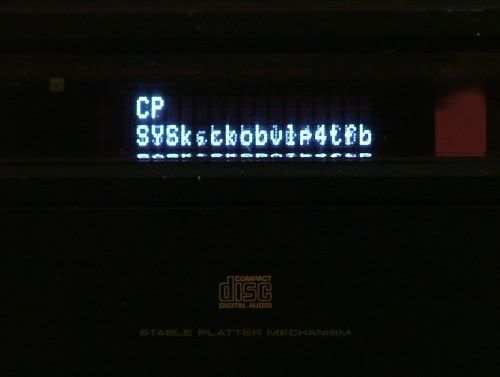
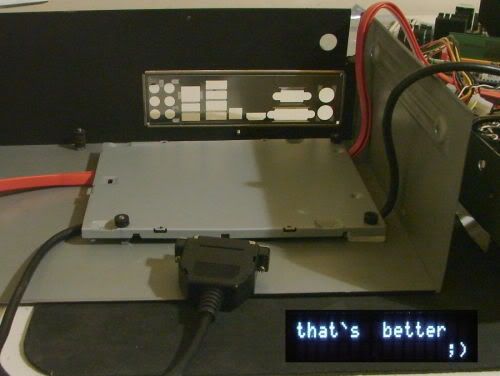
However, a small shield between the motherboard and cables solved the problem:
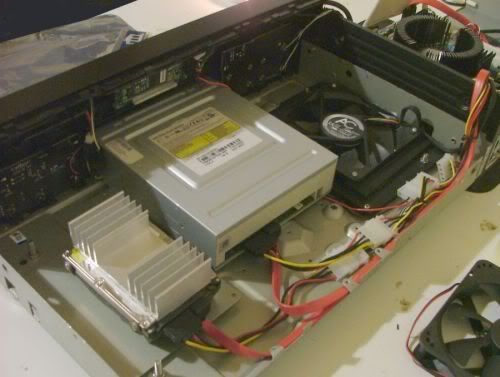
After routing all the cables:
Later I wanted to finalize my software setup. I wanted to be able to browse and playback music without turning the monitor on. Fortunately media portal seems to work very well in this regard. It`s quite easy to browse files by using the vfd alone:

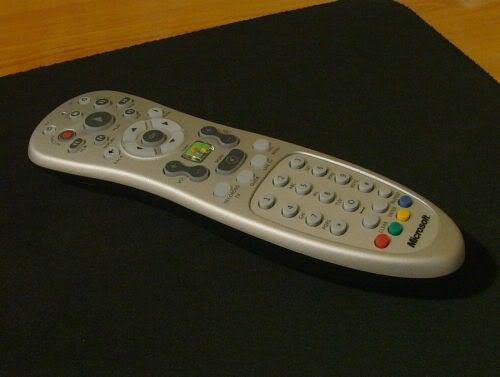
and finally, the obligatory rempte control:
I did encounter something odd: performance with firefox and media portal was very sluggish. Pentium 2 sluggish. I ended up reformatting quite a few times, trying different drivers. In the end I found out it was a bios issue: the problem was triggered by setting gpu memory to anything other than 256mb.
With this issue behind me I think I`m almost done. Still, I`d like to make a couple of improvements: Use some aluminium sheets to improve EMI shielding and get an external DAC to drive my stereo amp (no digital input).
Now if only the psu arrives before I run out of holidays...
update 4/8/08 test fitting
Check out the clearance. There uhhhm, there isn`t any..
update 3/8/08 #2
Playing with voltage a litttle:
stock settings:
1-2.1ghz @ 1-1.2v
.........M/B . CPU . HDD . . .FAN
Idle . : 32 . . 25 . . . 34 . . . 600RPM
Load : 33 . . 42 . . . 36 . . 1000RPM
2.1ghz @1.2v (QNQ off)
.........M/B . CPU . HDD . . .FAN
Idle . : 32 . . 28 . . . 34 . . . 750RPM
Load : 33 . . 42 . . . 36 . . 1000RPM
2.1ghz @.95v
.........M/B . CPU . HDD . . . .FAN
Idle . : 32 . . 26 . . . 34 . . . 600RPM
Load : 33 . . 35 . . . 36 . . . 800RPM
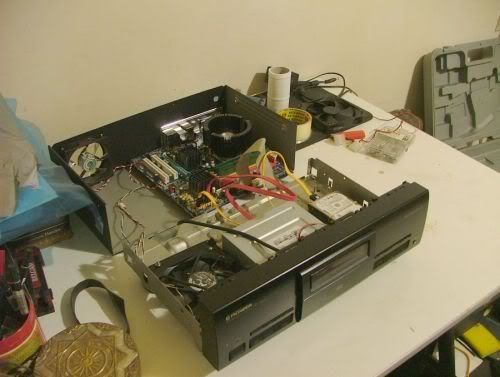
update 3/8/08
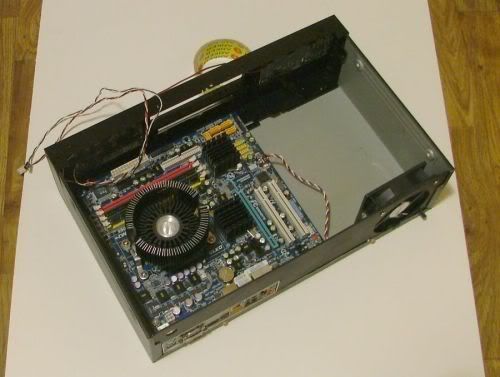
I borrowed the seasonic from my main computer and powered up the system for the first time. It`s not a pretty sight but here`s a picture nevertheless:
I was a little nervous: if the cables for the eject button were not soldered right my cd rom would get stuck in there forever. This is because the bezel is screwed on the disk tray and access is only possible when the tray is open.
pic:
As you can see it took a few attempts
Once closed there`s no return!
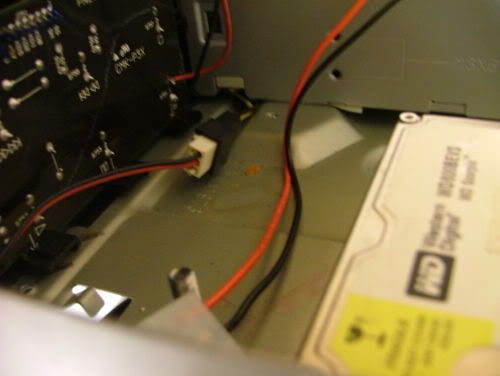
I also soldered another set of cables on the cd rom: this is to feed the disk activity led
Fortunately everything went fine, power, eject buttons, disk activity leds all working.

The AC pwm fan proved to be unnecessary, at least with bios 6.00pg this board can throttle analog fans just fine. The 12 cm intake fan is controlled by the cpu temperature, starting @600rpm and increasing to ~1000 at load. The 9cm exhaust starts at 850 and only speeds up to 980rpm at load.
I did a brief stress test using two instances of cpu burn, mind you the case is still open. Load hdd temp is during defraging.
Ambient: 30c
1-2.1ghz @ 1-1.2v
.........M/B . CPU . HDD . . .FAN
Idle . : 32 . . 25 . . . 34 . . . 600RPM
Load : 33 . . 42 . . . 36 . . 1000RPM
Notice something wrong? The CPU is below ambient. I didn`t even mention the temp returned by the on-die sensor: an impossible 10c. The only credible temperature is that of the disk drive which I was able to decrease by strapping a couple of heatisnks. This also reduced idle noise.
pic
Anyway, I touched various components with my hand and none seemed to run hot. Here are my obrservations:
Mosfets: fairly warm
Southbridge: barely warm
Northbridge: warm
CPU: cool
Memory: cool
HDD: quite warm (and latter just warm)
So if the disk drive temperature was indeed 39c all other components should be below that, they felt cooler.
Noise (with case open): With both fans running below 1000rpm the system is fairly quiet as you would expect. Since many people are away on holiday ambient noise is pretty low. At 6pm I couldn`t hear the system, now I can start to make out the 12cm yate loon. Surprisinly, the disk drive is not the loudest component.
2/8/08
Hello everyone,
So, I wanted to build myself an htpc but I`ve been a little picky about the enclosure. While there are plenty of decent cases out there I wanted something a bit more special, something that really blends with the rest of my hi fi equipment. And it seems I had just the right enclosure lying around: the carcass of an old cd player!
The size seemed right, I took the exact dimensions and ordered the following components:
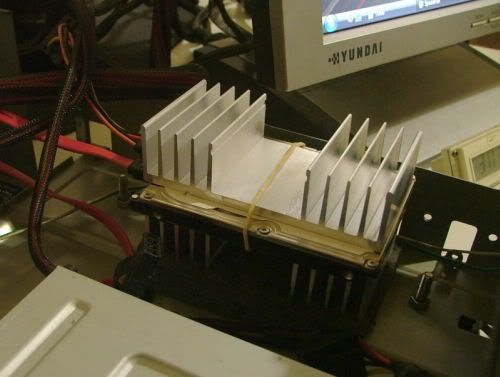
Gigabyte 780g mobo /Xilence coolers
Athlon BE 2.1 / Thermaltake mini orb
2 gigs of Crucial ram
12cm Arctic PWM fan
9cm enermax
a small vfd display to replace that of the cd player
..and of course, a pico psu
Finaly I used a samsung dvd burner I already had and the 80gb wd scorpio from my main computer.
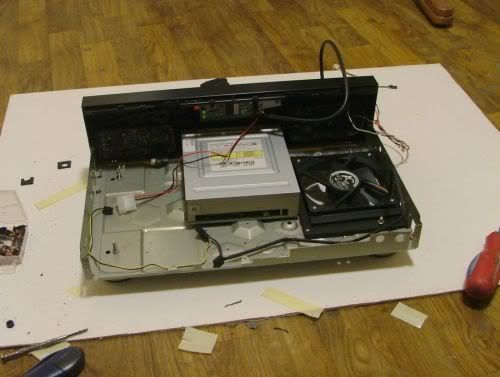
After some planning I decided to fit the motherboard upside down and have a big intake fan at the bottom of the case. The mini orb was the largest cooler that would fit in the available space and also seemed to be the best suited for low airflow.
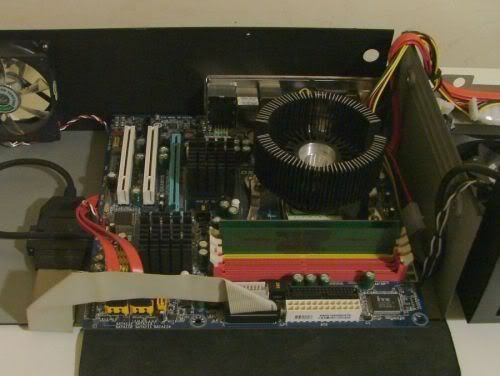
First I attached the motherboard to the top panel and added a custom backplate. The result looks like this:
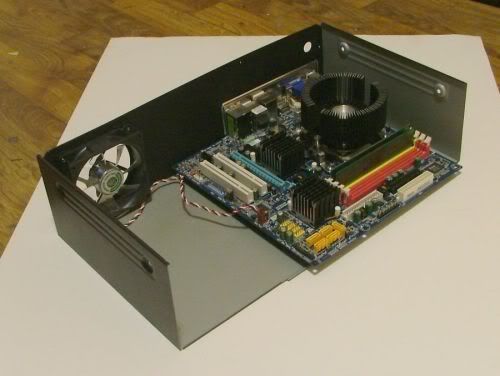
That was a tight fit!
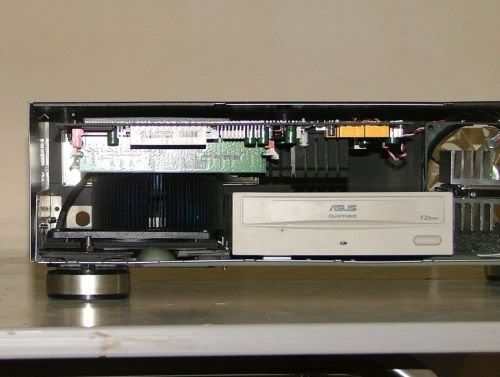
Now the bottom of the case: it holds the intake fan and the disk drives. I you look closely you can make out the vfd, above the cd rom. There are various cables coming off the faceplate, I`ll explain that later.
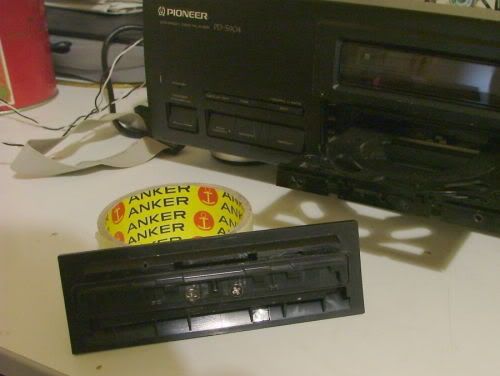
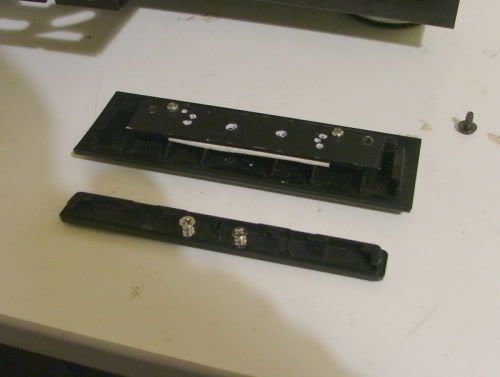
I wanted to use the original buttons and leds of the cd player So I took them apart in order to solder the cables that connect to the motherboard.
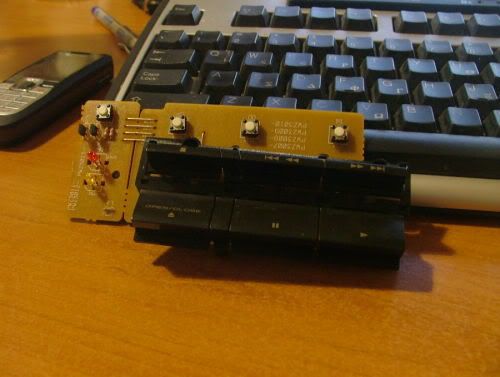
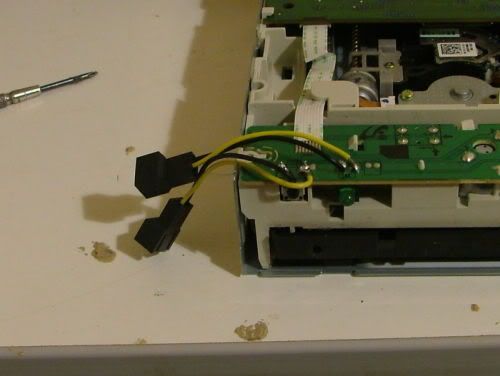
I also thought it would be cool to have the old eject button open the cd rom. I did some more soldering but this time I also used a couple of fan headers: this way I can remove the cd rom without unsoldering the cables.
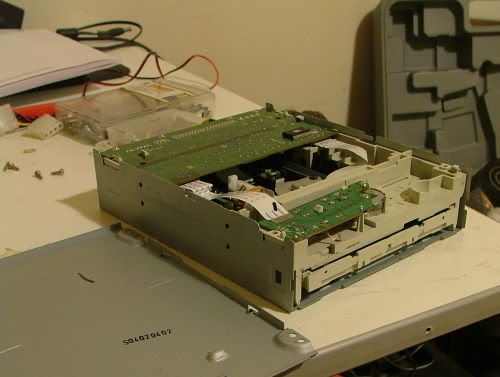
I first practiced soldering on this old burner:
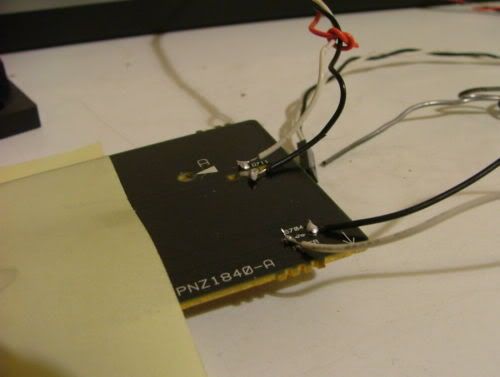
Close up of the fan headers:
The case is still open as I`m still wainting for that pico psu. I did connect everything so I can do a test drive tommorow.
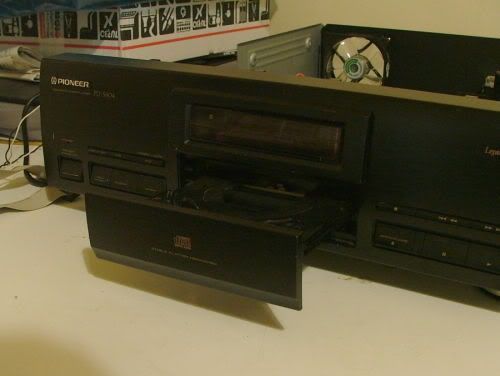
And finally a frontal shot:
